今回はTerraformを使ってAWSの東京リージョンにEC2インスタンスを起動してみたので、その方法と手順について備忘録としてまとめました。
Terraformとは

Terraformとはコードを使ってインフラを構築・変更・管理するためのツールです。
Terraformを使用することで、AWSやGoogle Cloud、Microsoft Azureなどのクラウドプロバイダー、Docker、GitHubといった様々なサービスのインフラをコードベースで管理することができます。
またTerraformはHCL (HashiCorp Configuration Language) と呼ばれる独自の構文を使用してインフラの構成を記述します。HCLは人間が読み書きしやすく、構成ファイルをテキストエディタで編集できるため、簡単にバージョン管理することができるという特徴を持ちます。
Terraformチュートリアル
AWSのアカウント登録
AWSのアカウントを持っていない方はまずはアカウント登録を行なってください。
IAMユーザーの作成
TerraformからAWSを操作するためのIAMユーザーを作成します。
IAM(Identity and Access Management)ユーザーとは、AWS上で特定のタスクに対する権限を持つユーザーのことです。
IAMユーザーを使用することで、必要なタスクに対して必要な権限のみを与えることができます。これによりAWSのリソースへのアクセスを制限し、AWSアカウントのセキュリティを向上させることができます。
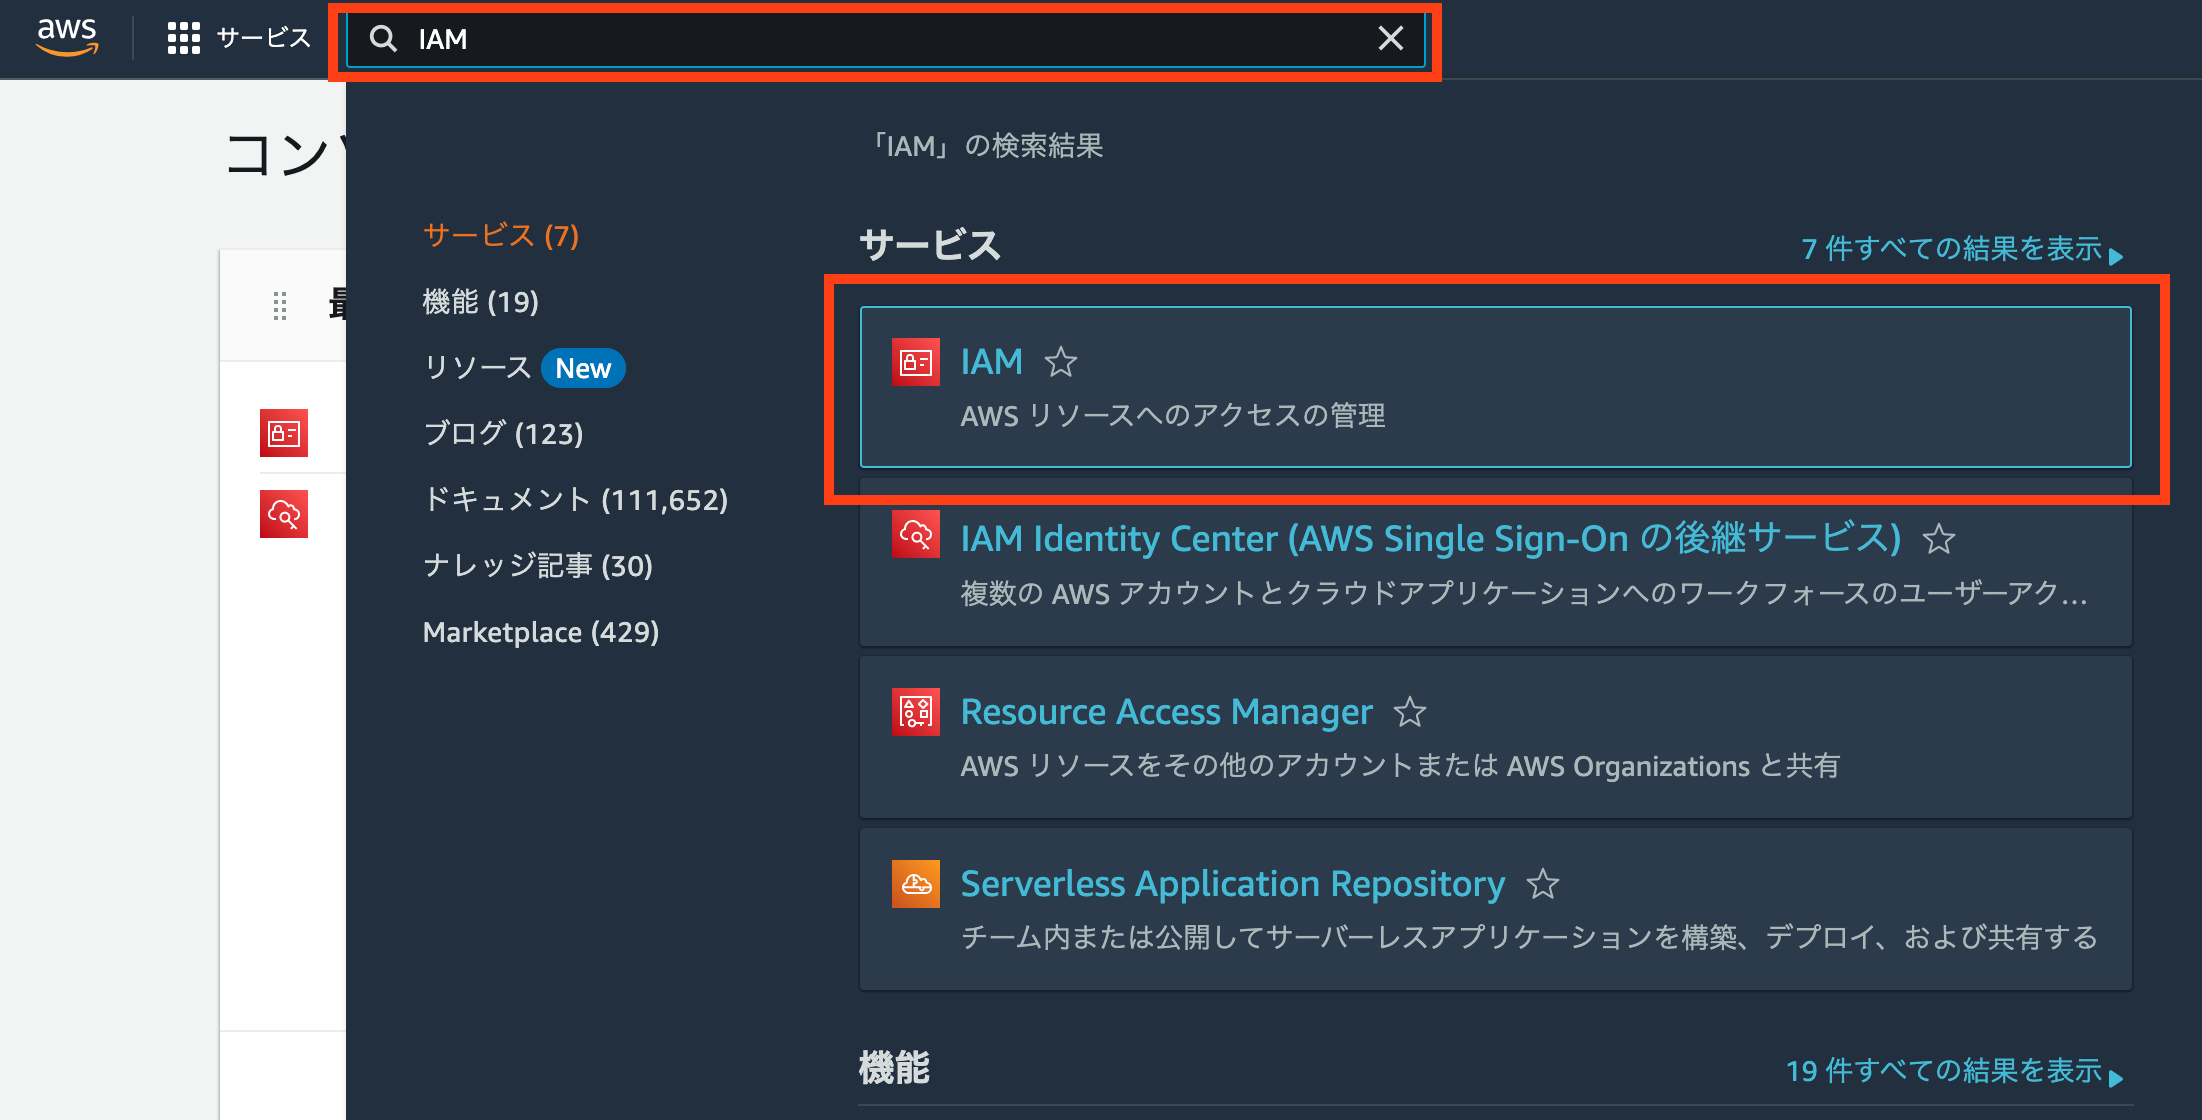
AWSの検索窓に「IAM」と入力し、「IAM」を選択します。
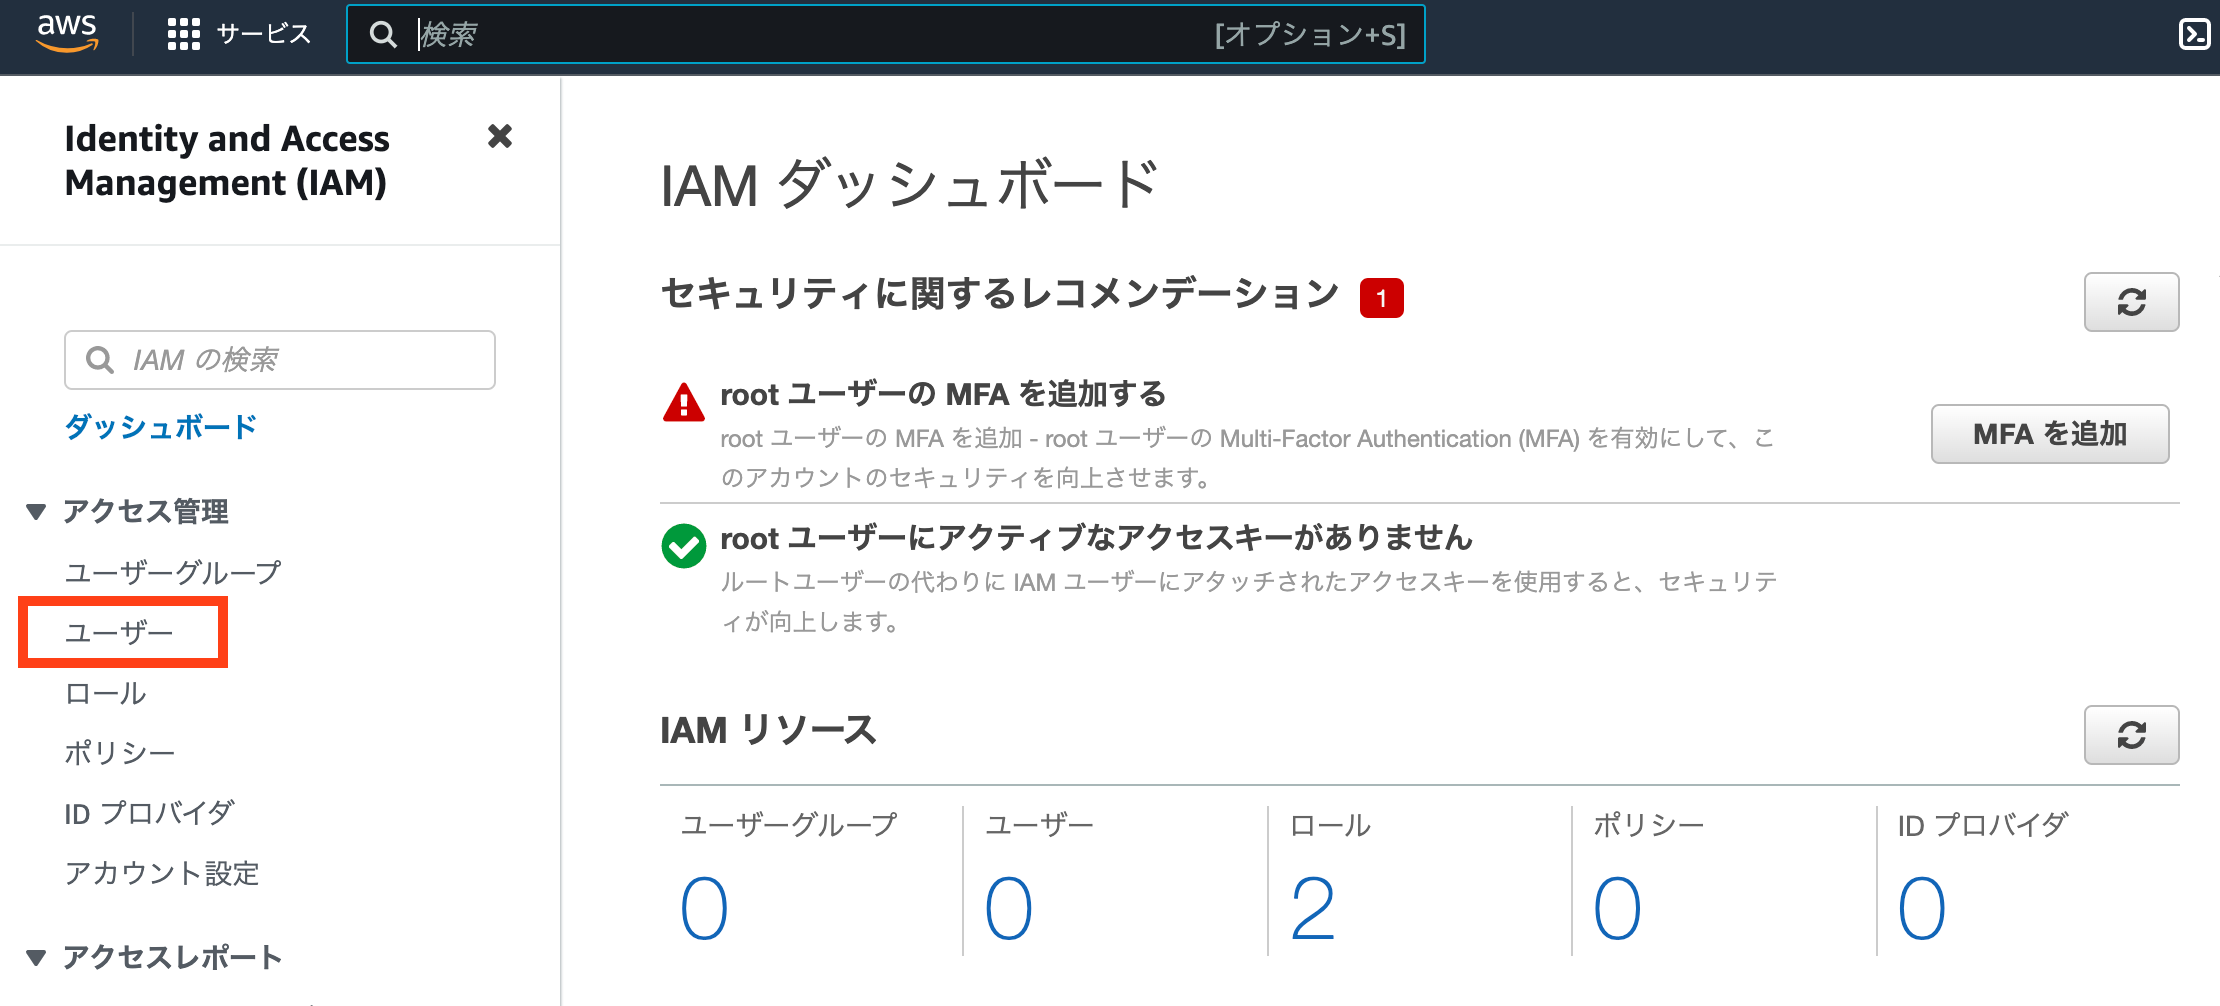
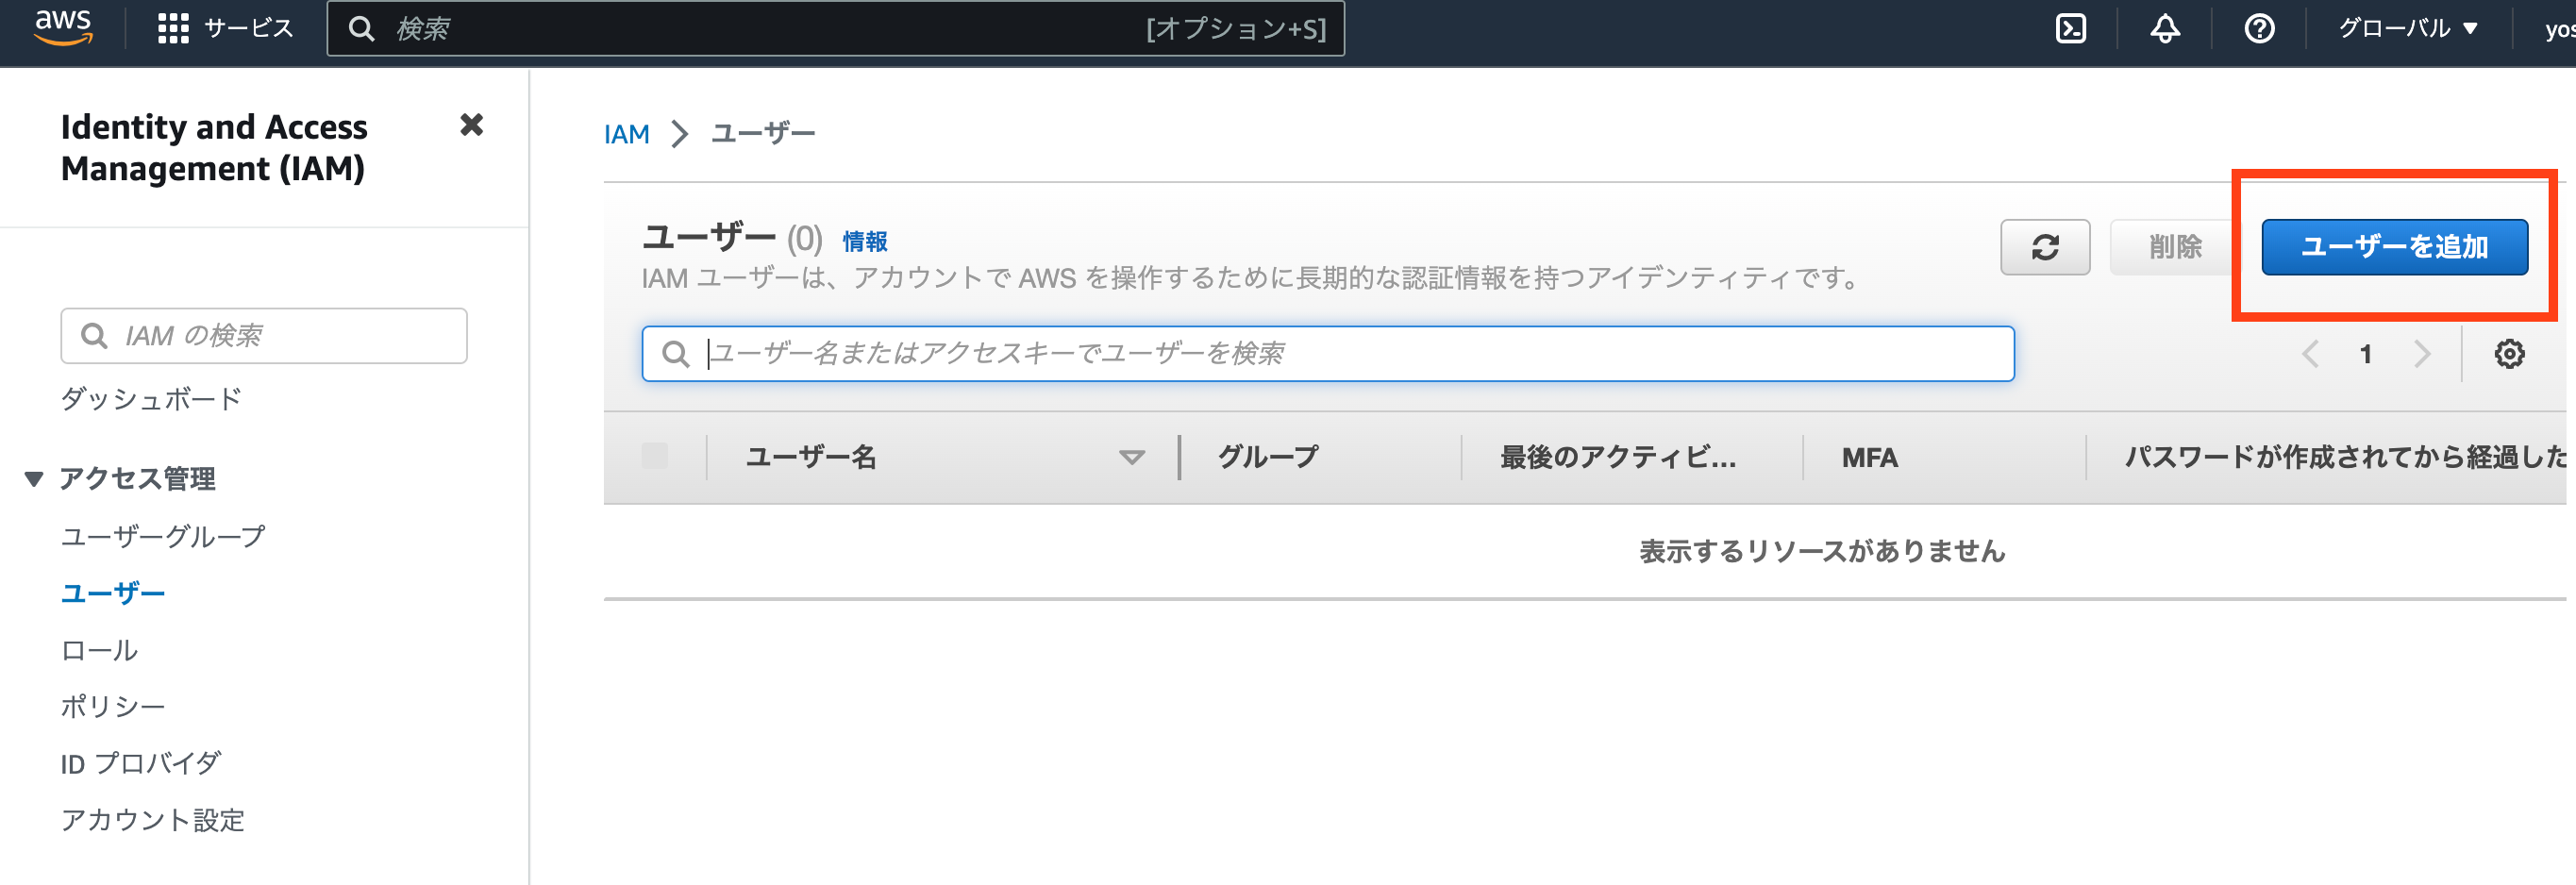
左のメニューから「ユーザー」を選択し、「ユーザーを追加」をクリックします。
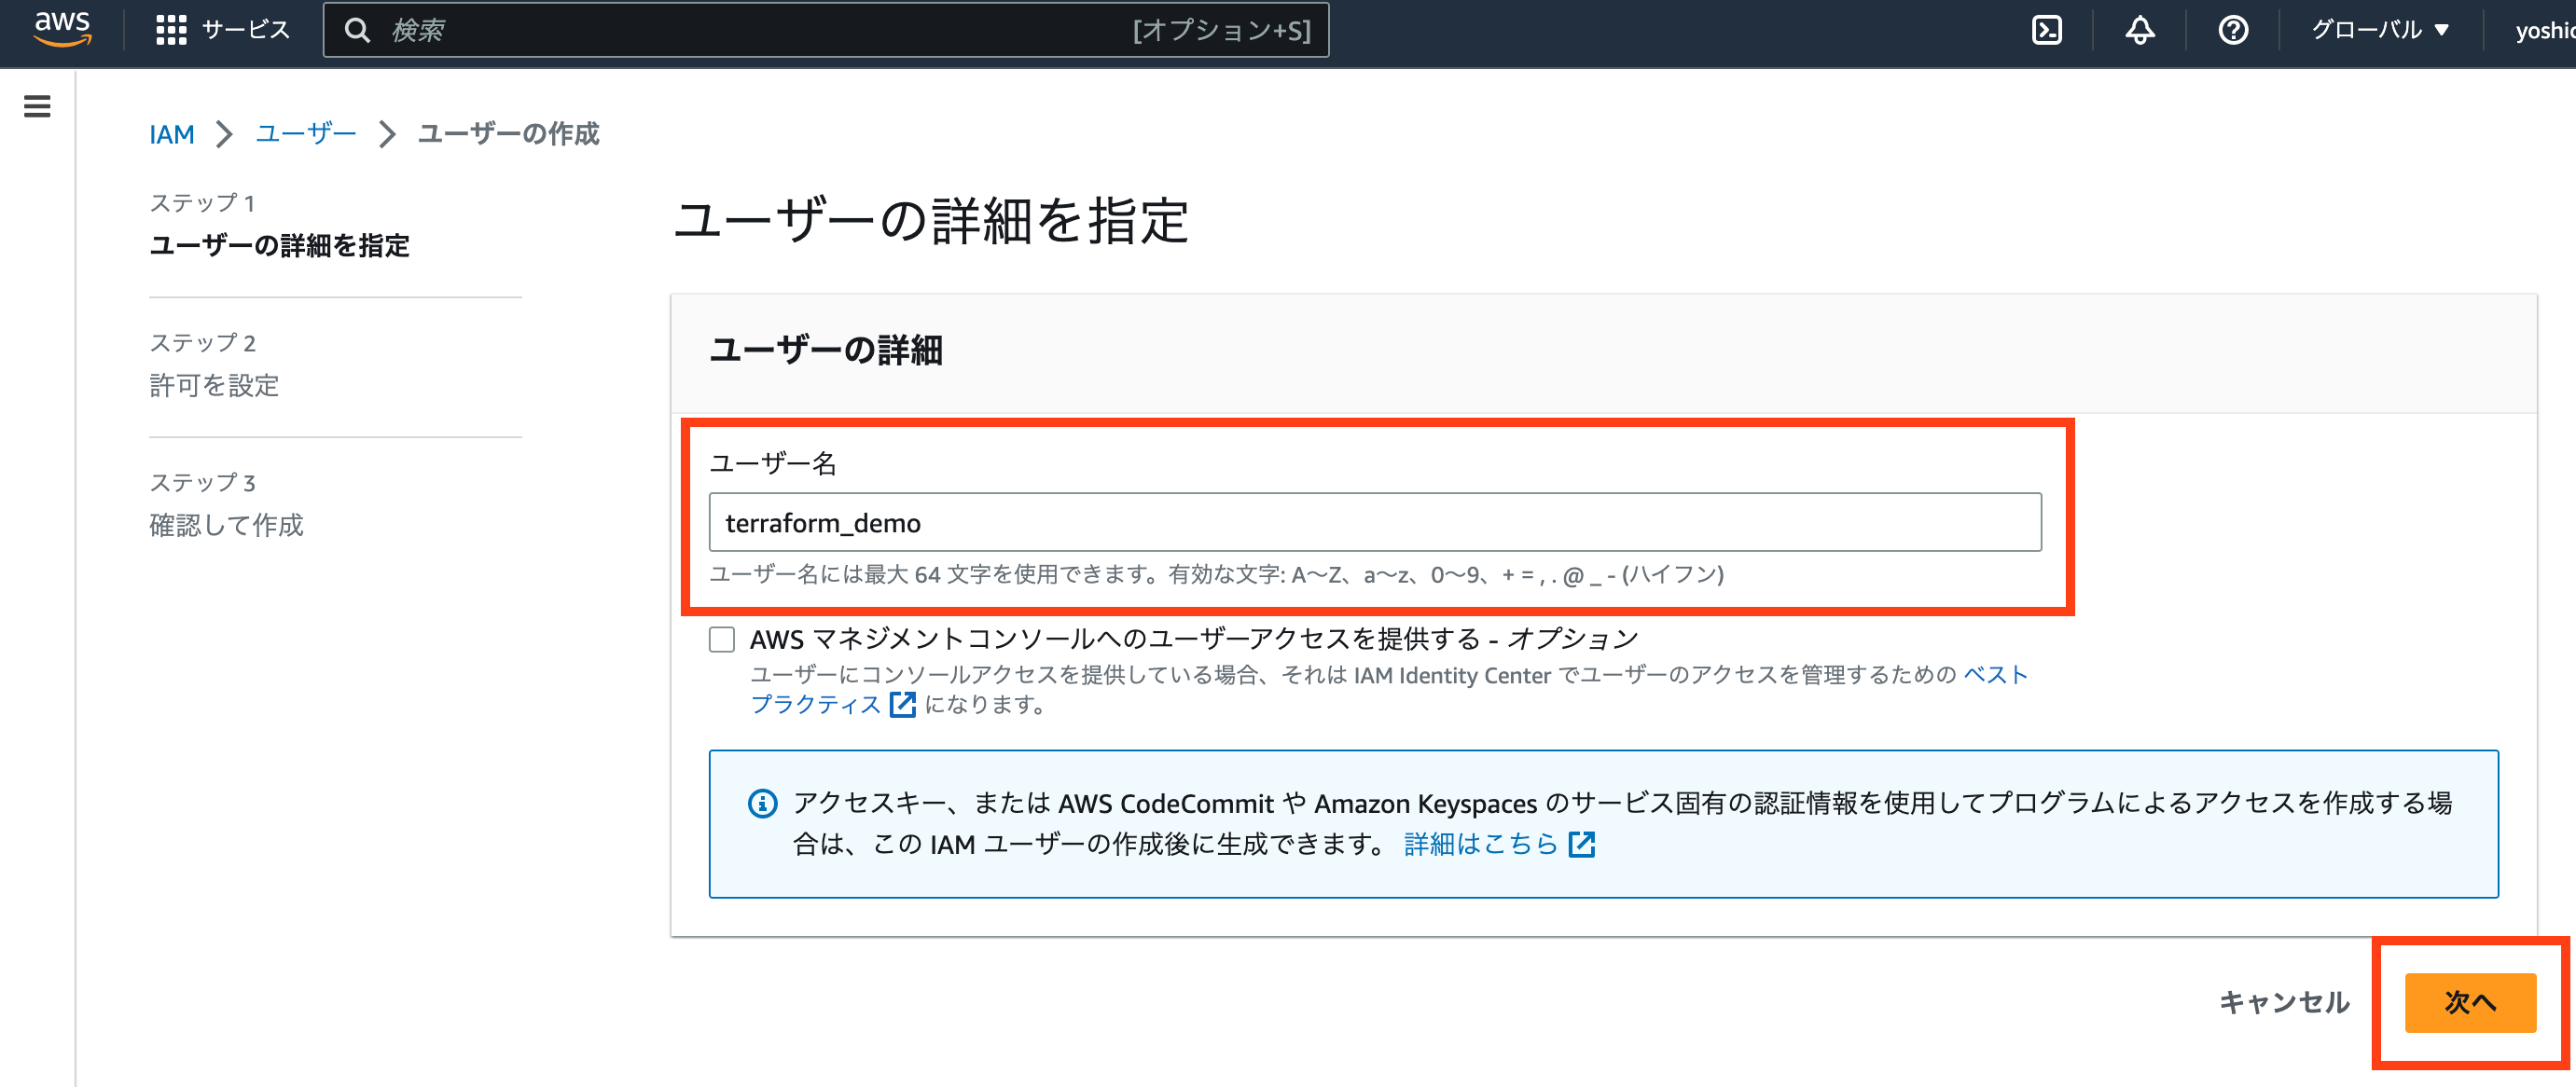
ユーザー名(今回はterraform_demo)を入力し、「次へ」をクリックします。
「ポリシーを直接アタッチする」を選択し、「AdministratorAccess」にチェックを入れ「次へ」をクリックします。
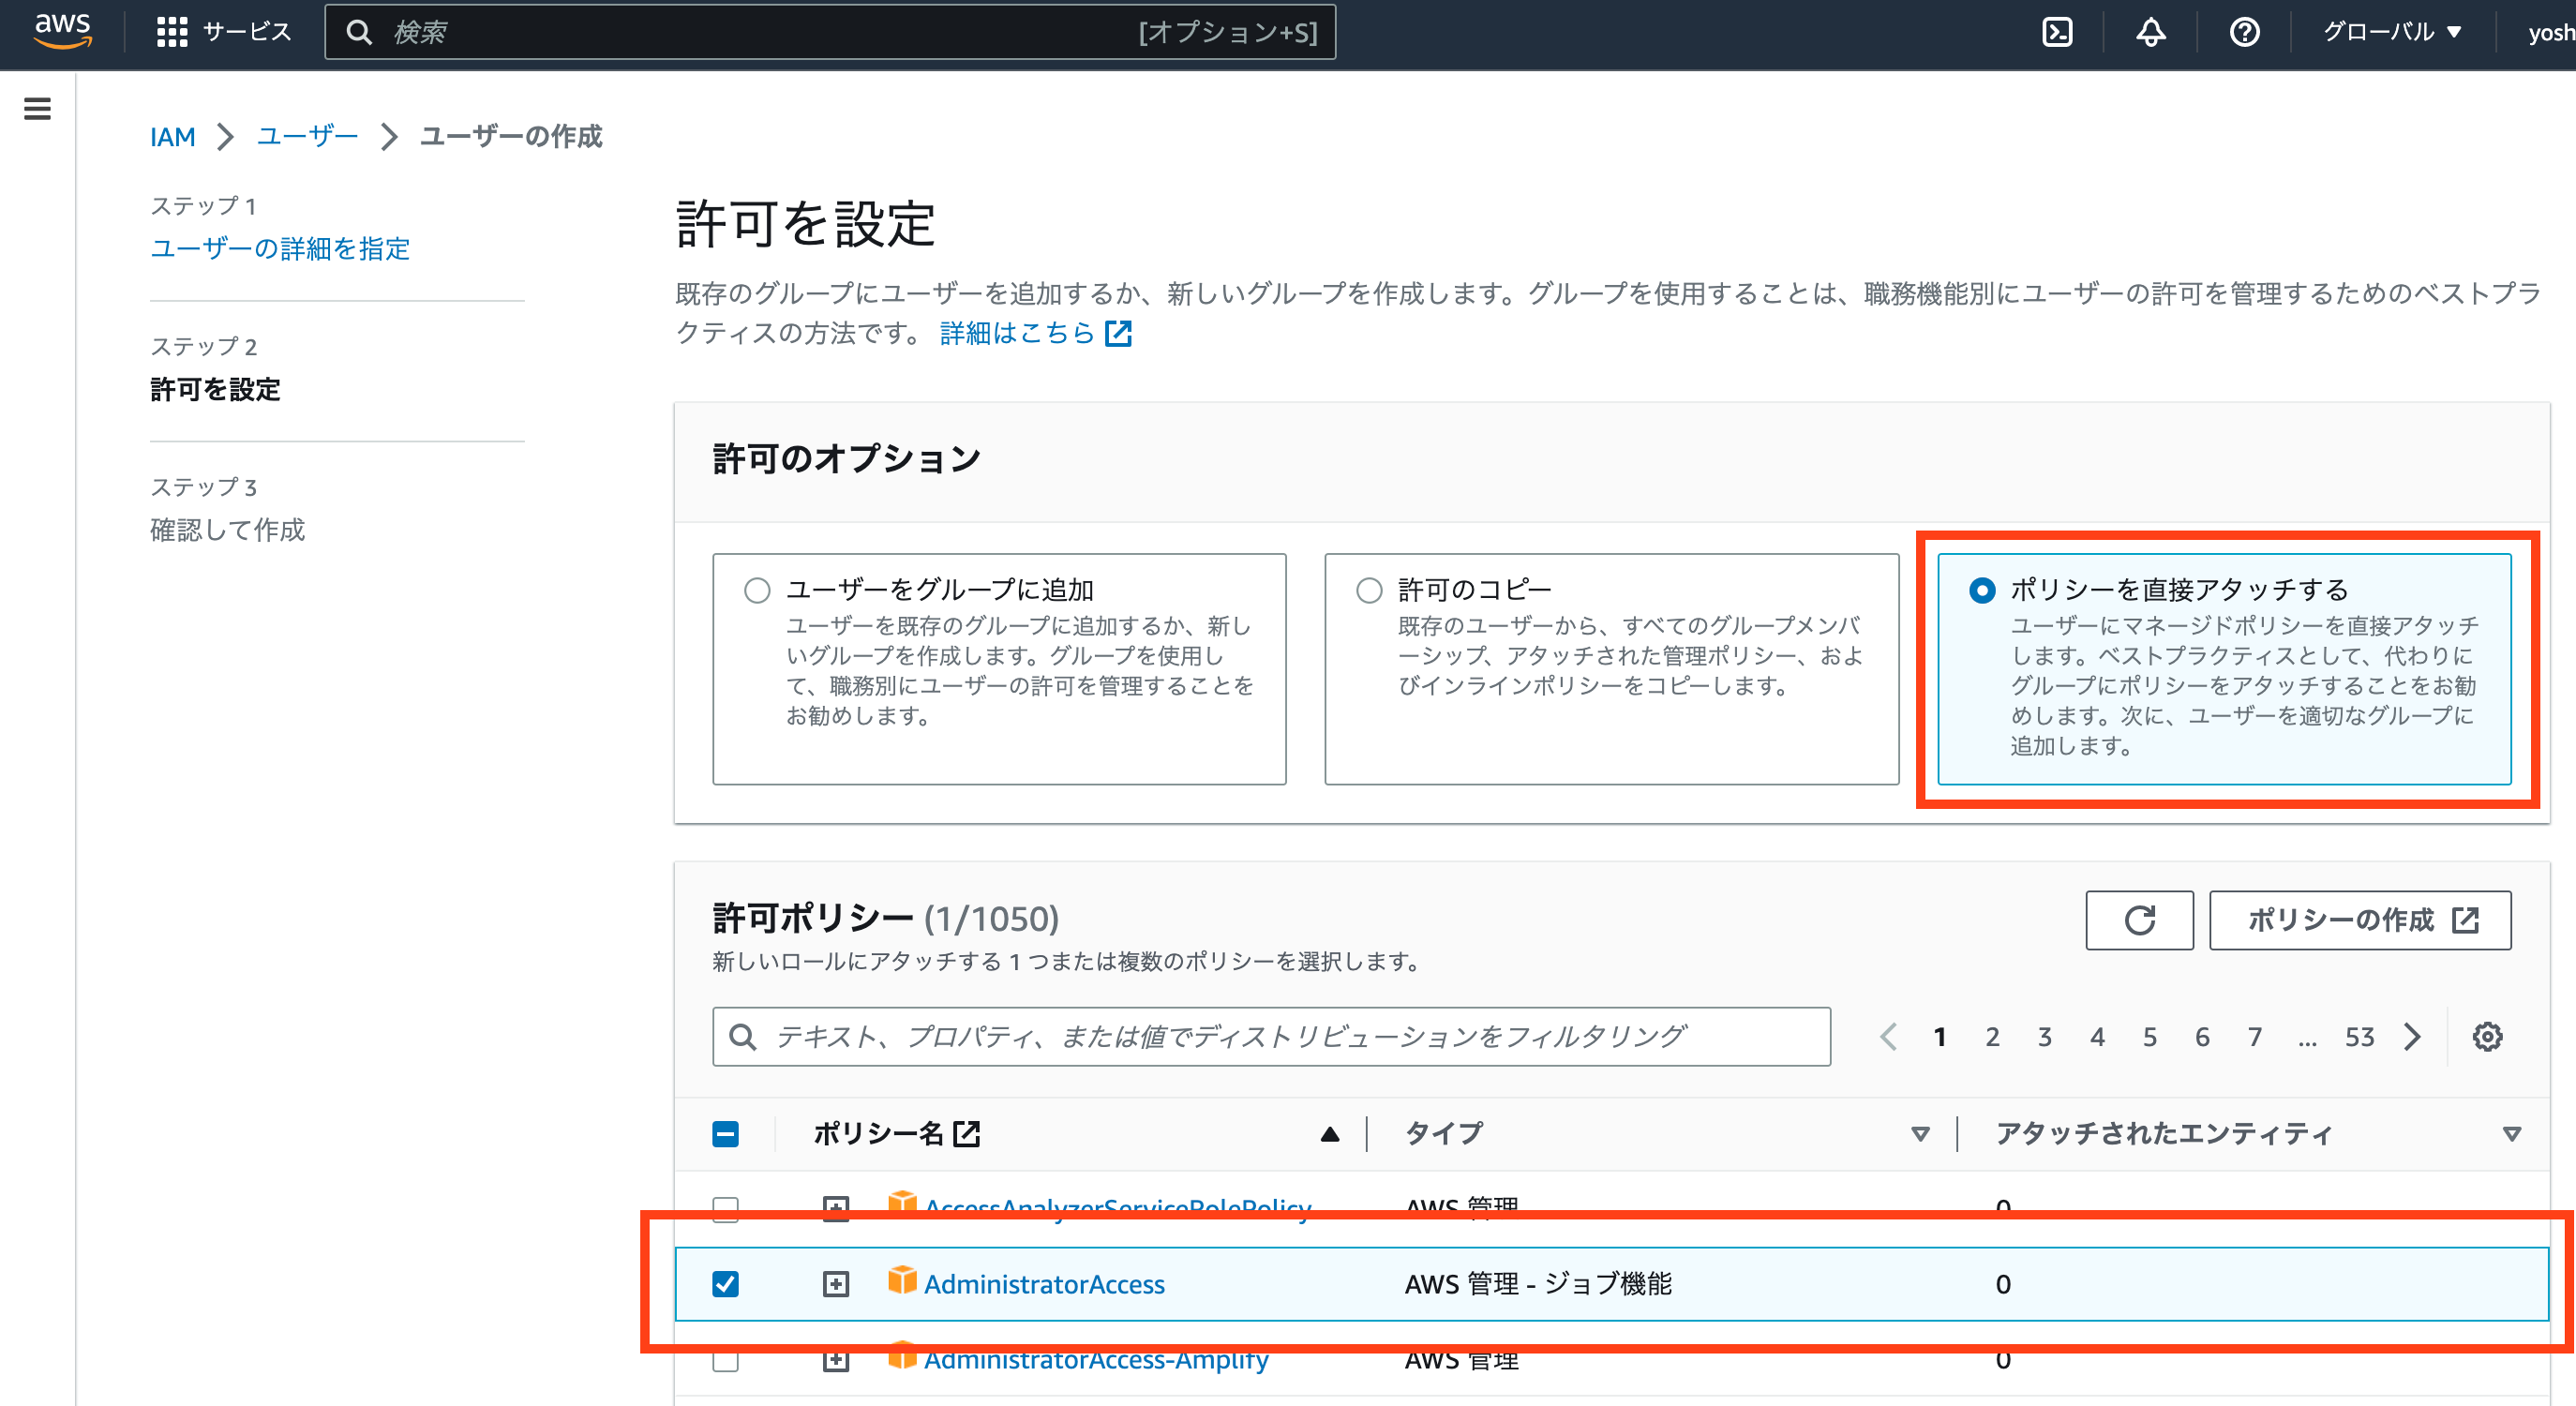

ポリシーをアタッチするとは、AWSのリソース(ストレージやデータベースなど)にアクセスする際に、そのアクセス権限を設定することを意味します。
AdministratorAccessは、AWSの管理者レベルの権限を持つIAMユーザーに対して付与されるIAMポリシーの1つです。
このポリシーを持つIAMユーザーは、AWSアカウント内のあらゆるリソースにアクセスできます。例えば、EC2インスタンスの起動や停止、S3バケットの作成や削除、IAMユーザーの作成や削除など、あらゆるAWSサービスやリソースを管理することができます。
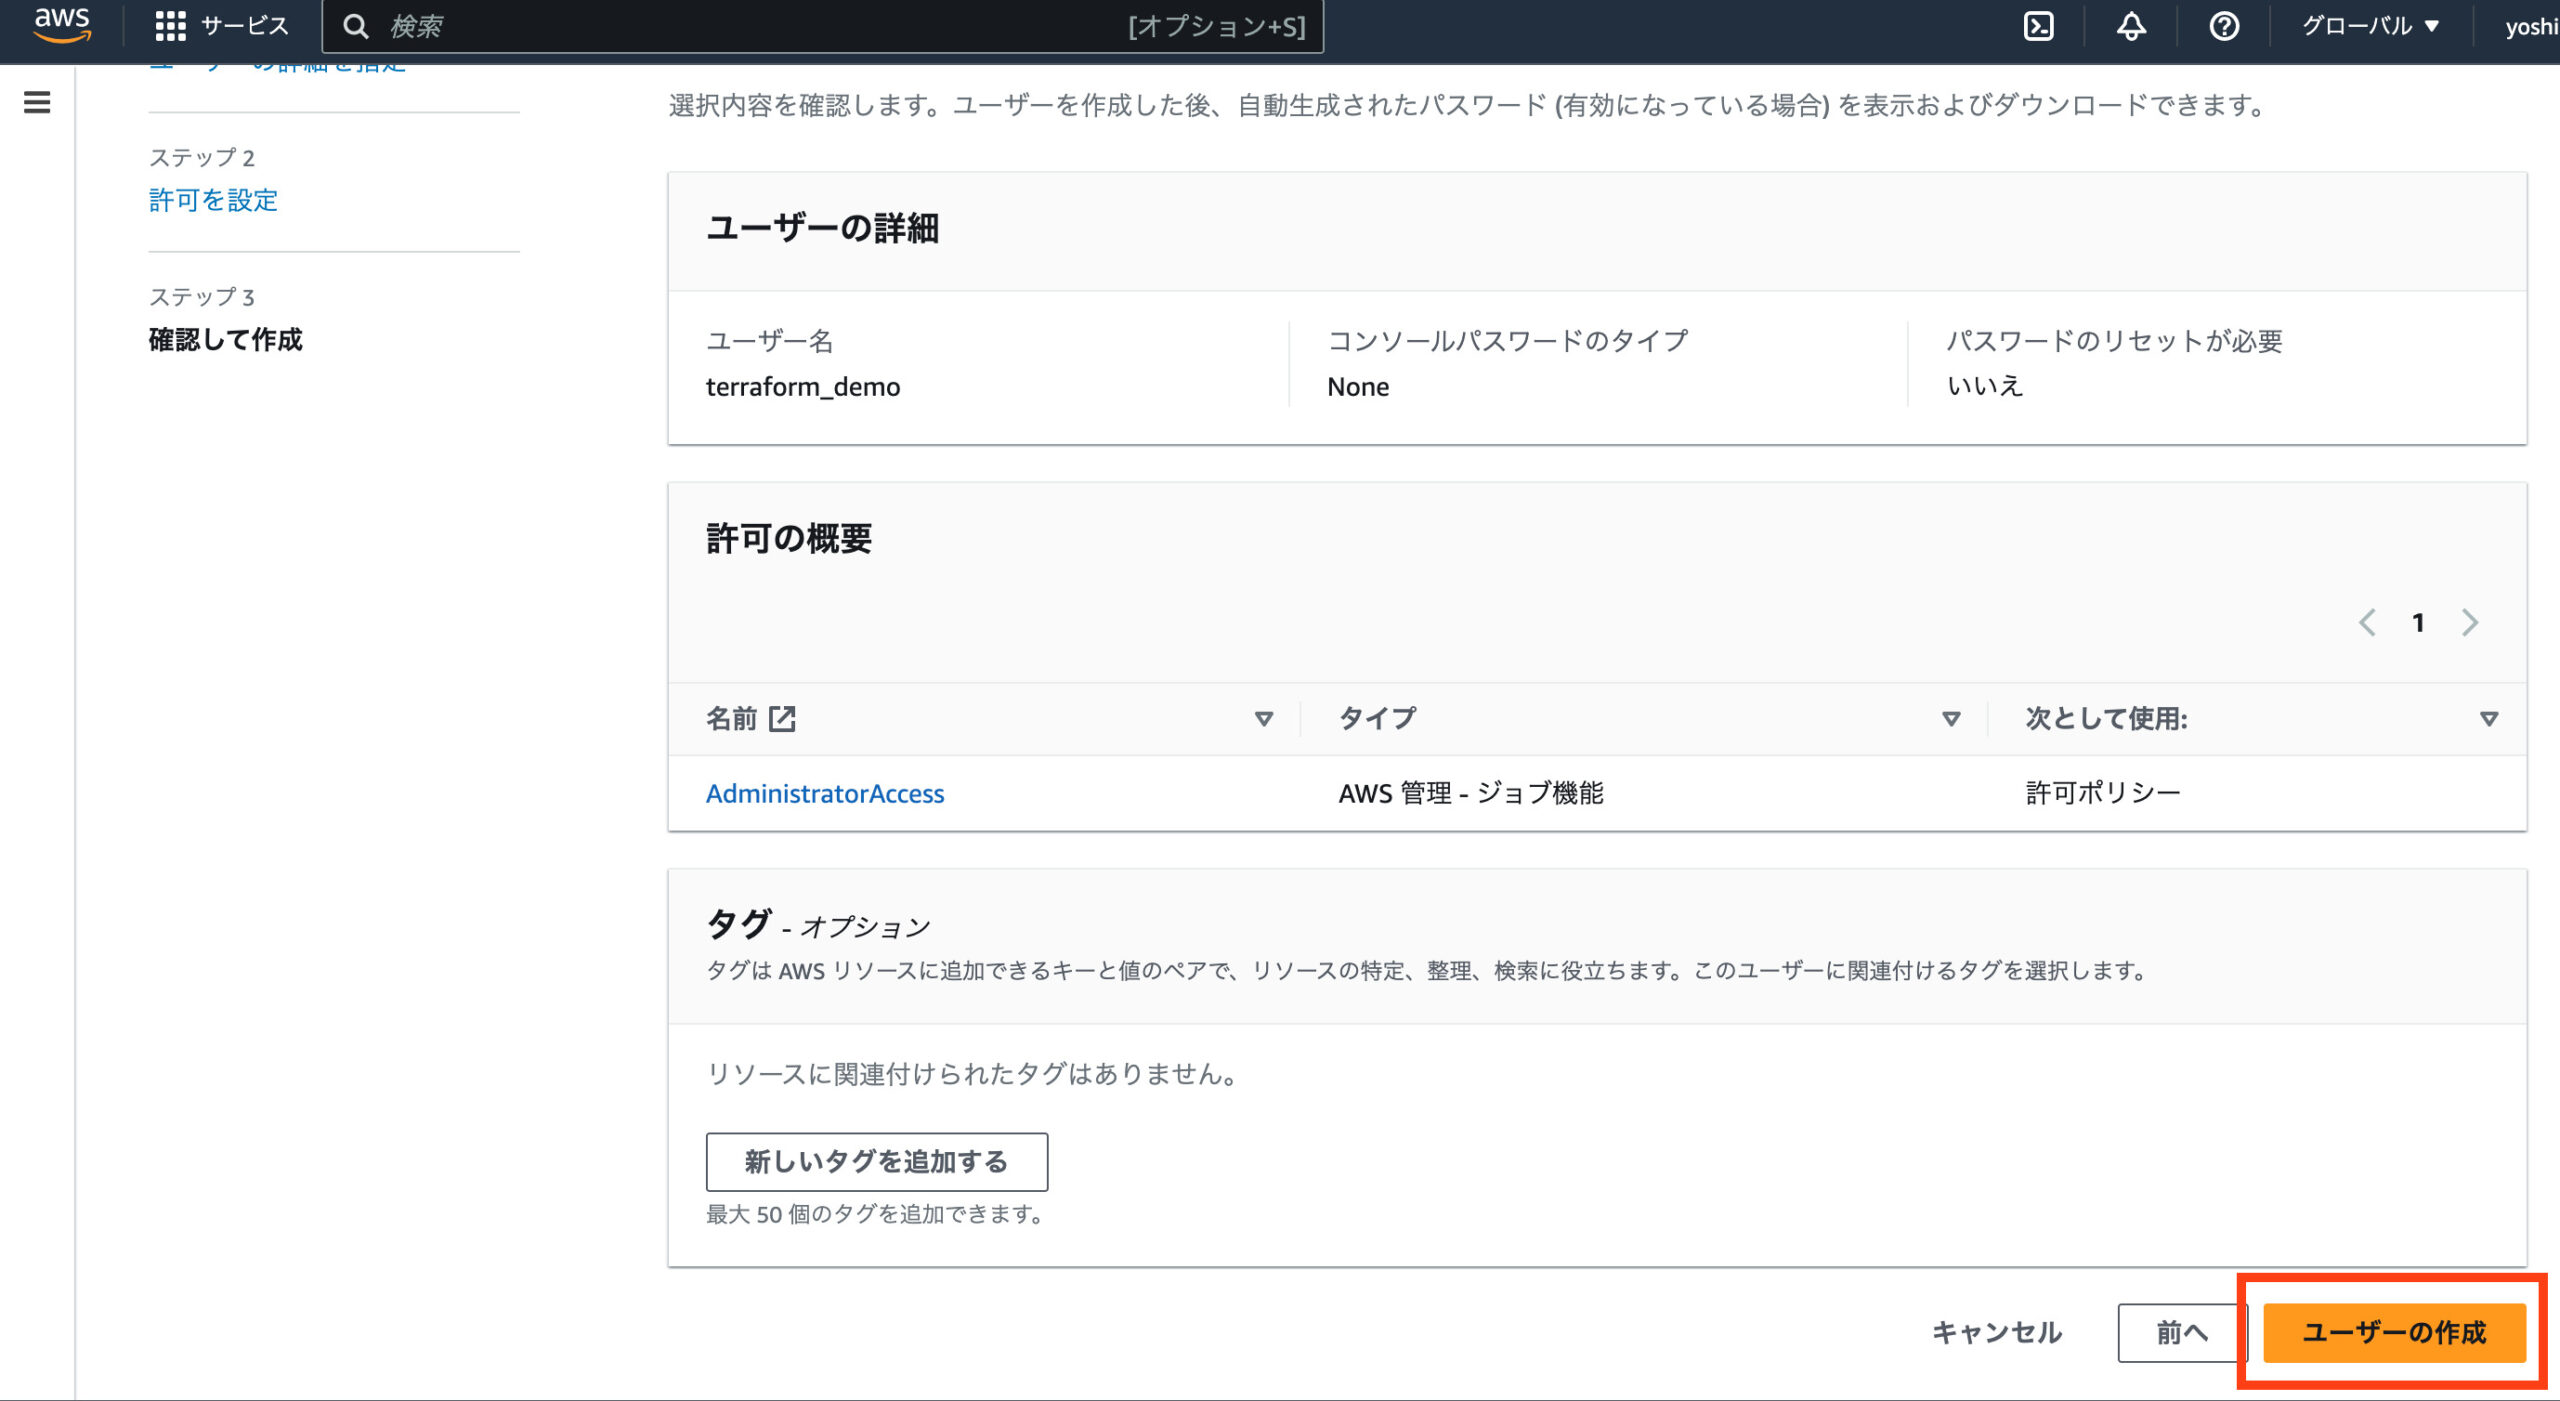
確認ページに遷移するため、「ユーザーの作成」をクリックします。
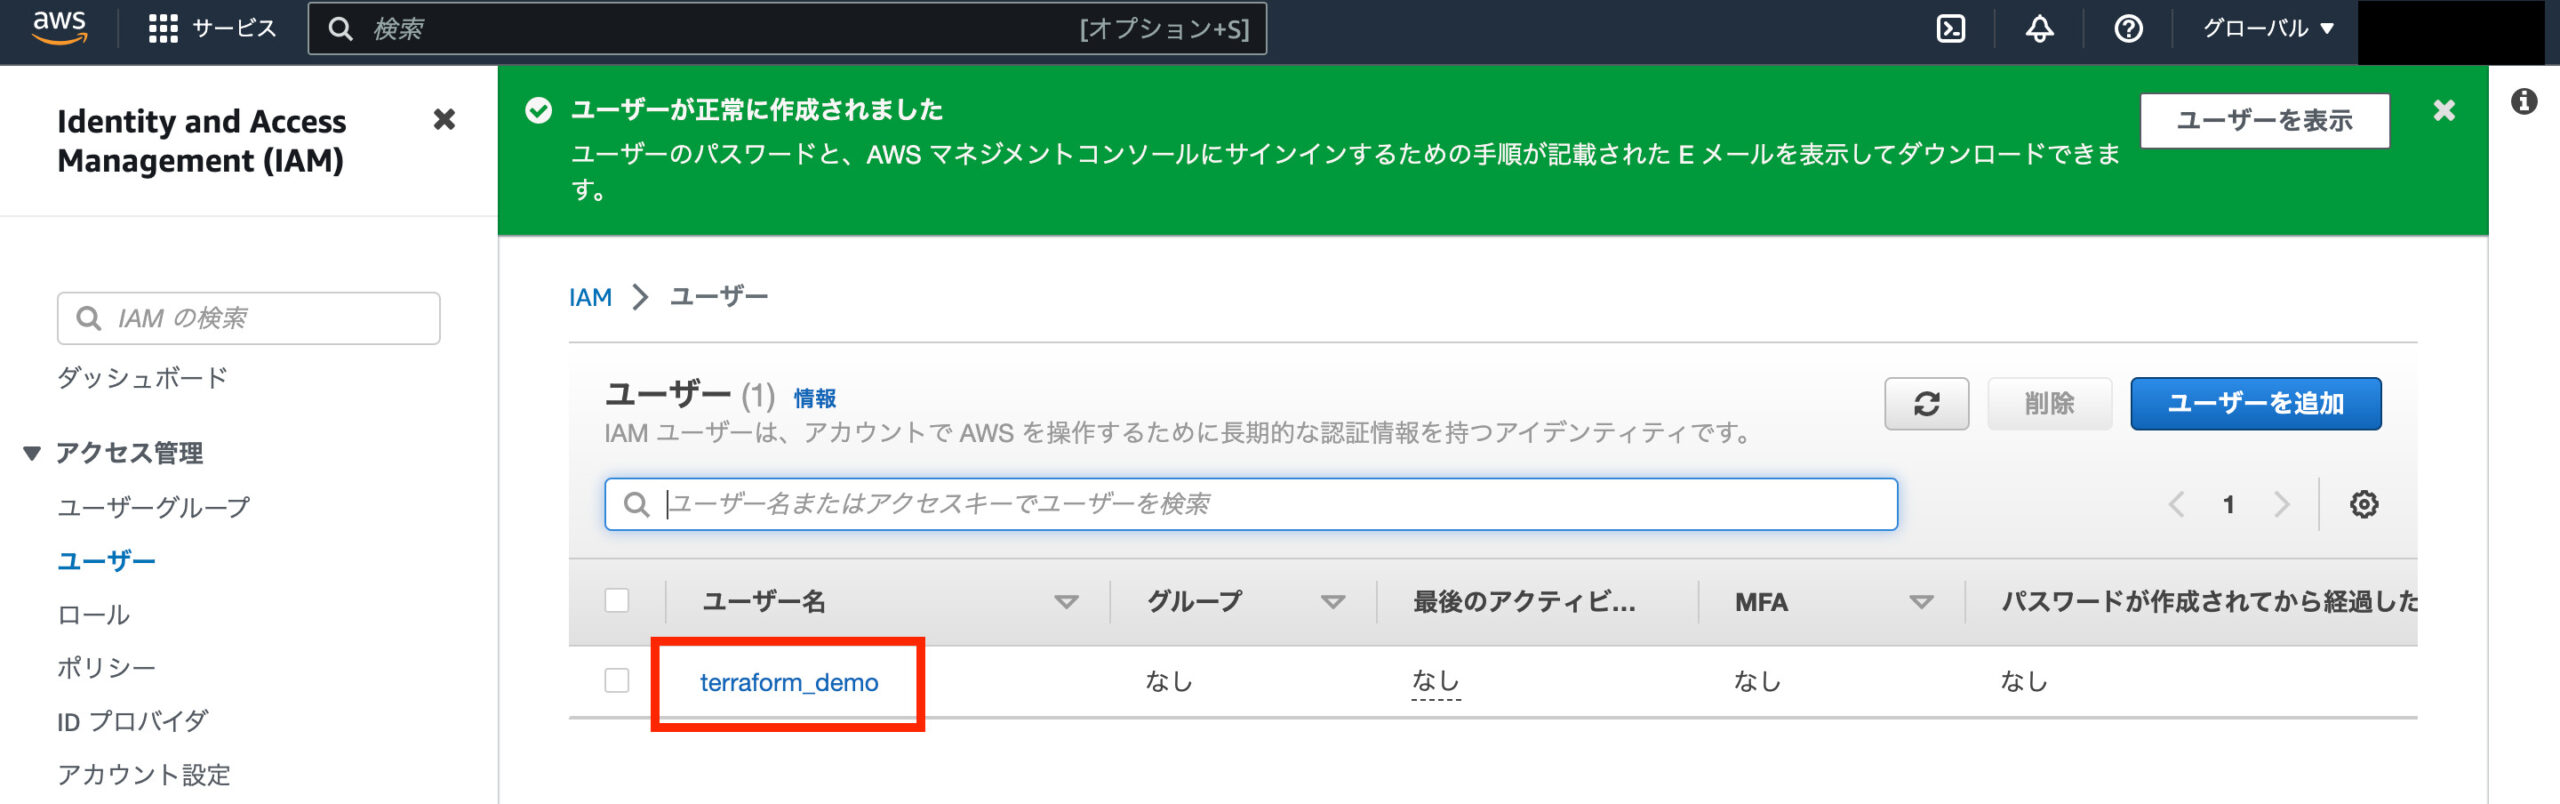
ユーザー作成完了後、作成したユーザー(terraform_demo)をクリックします。
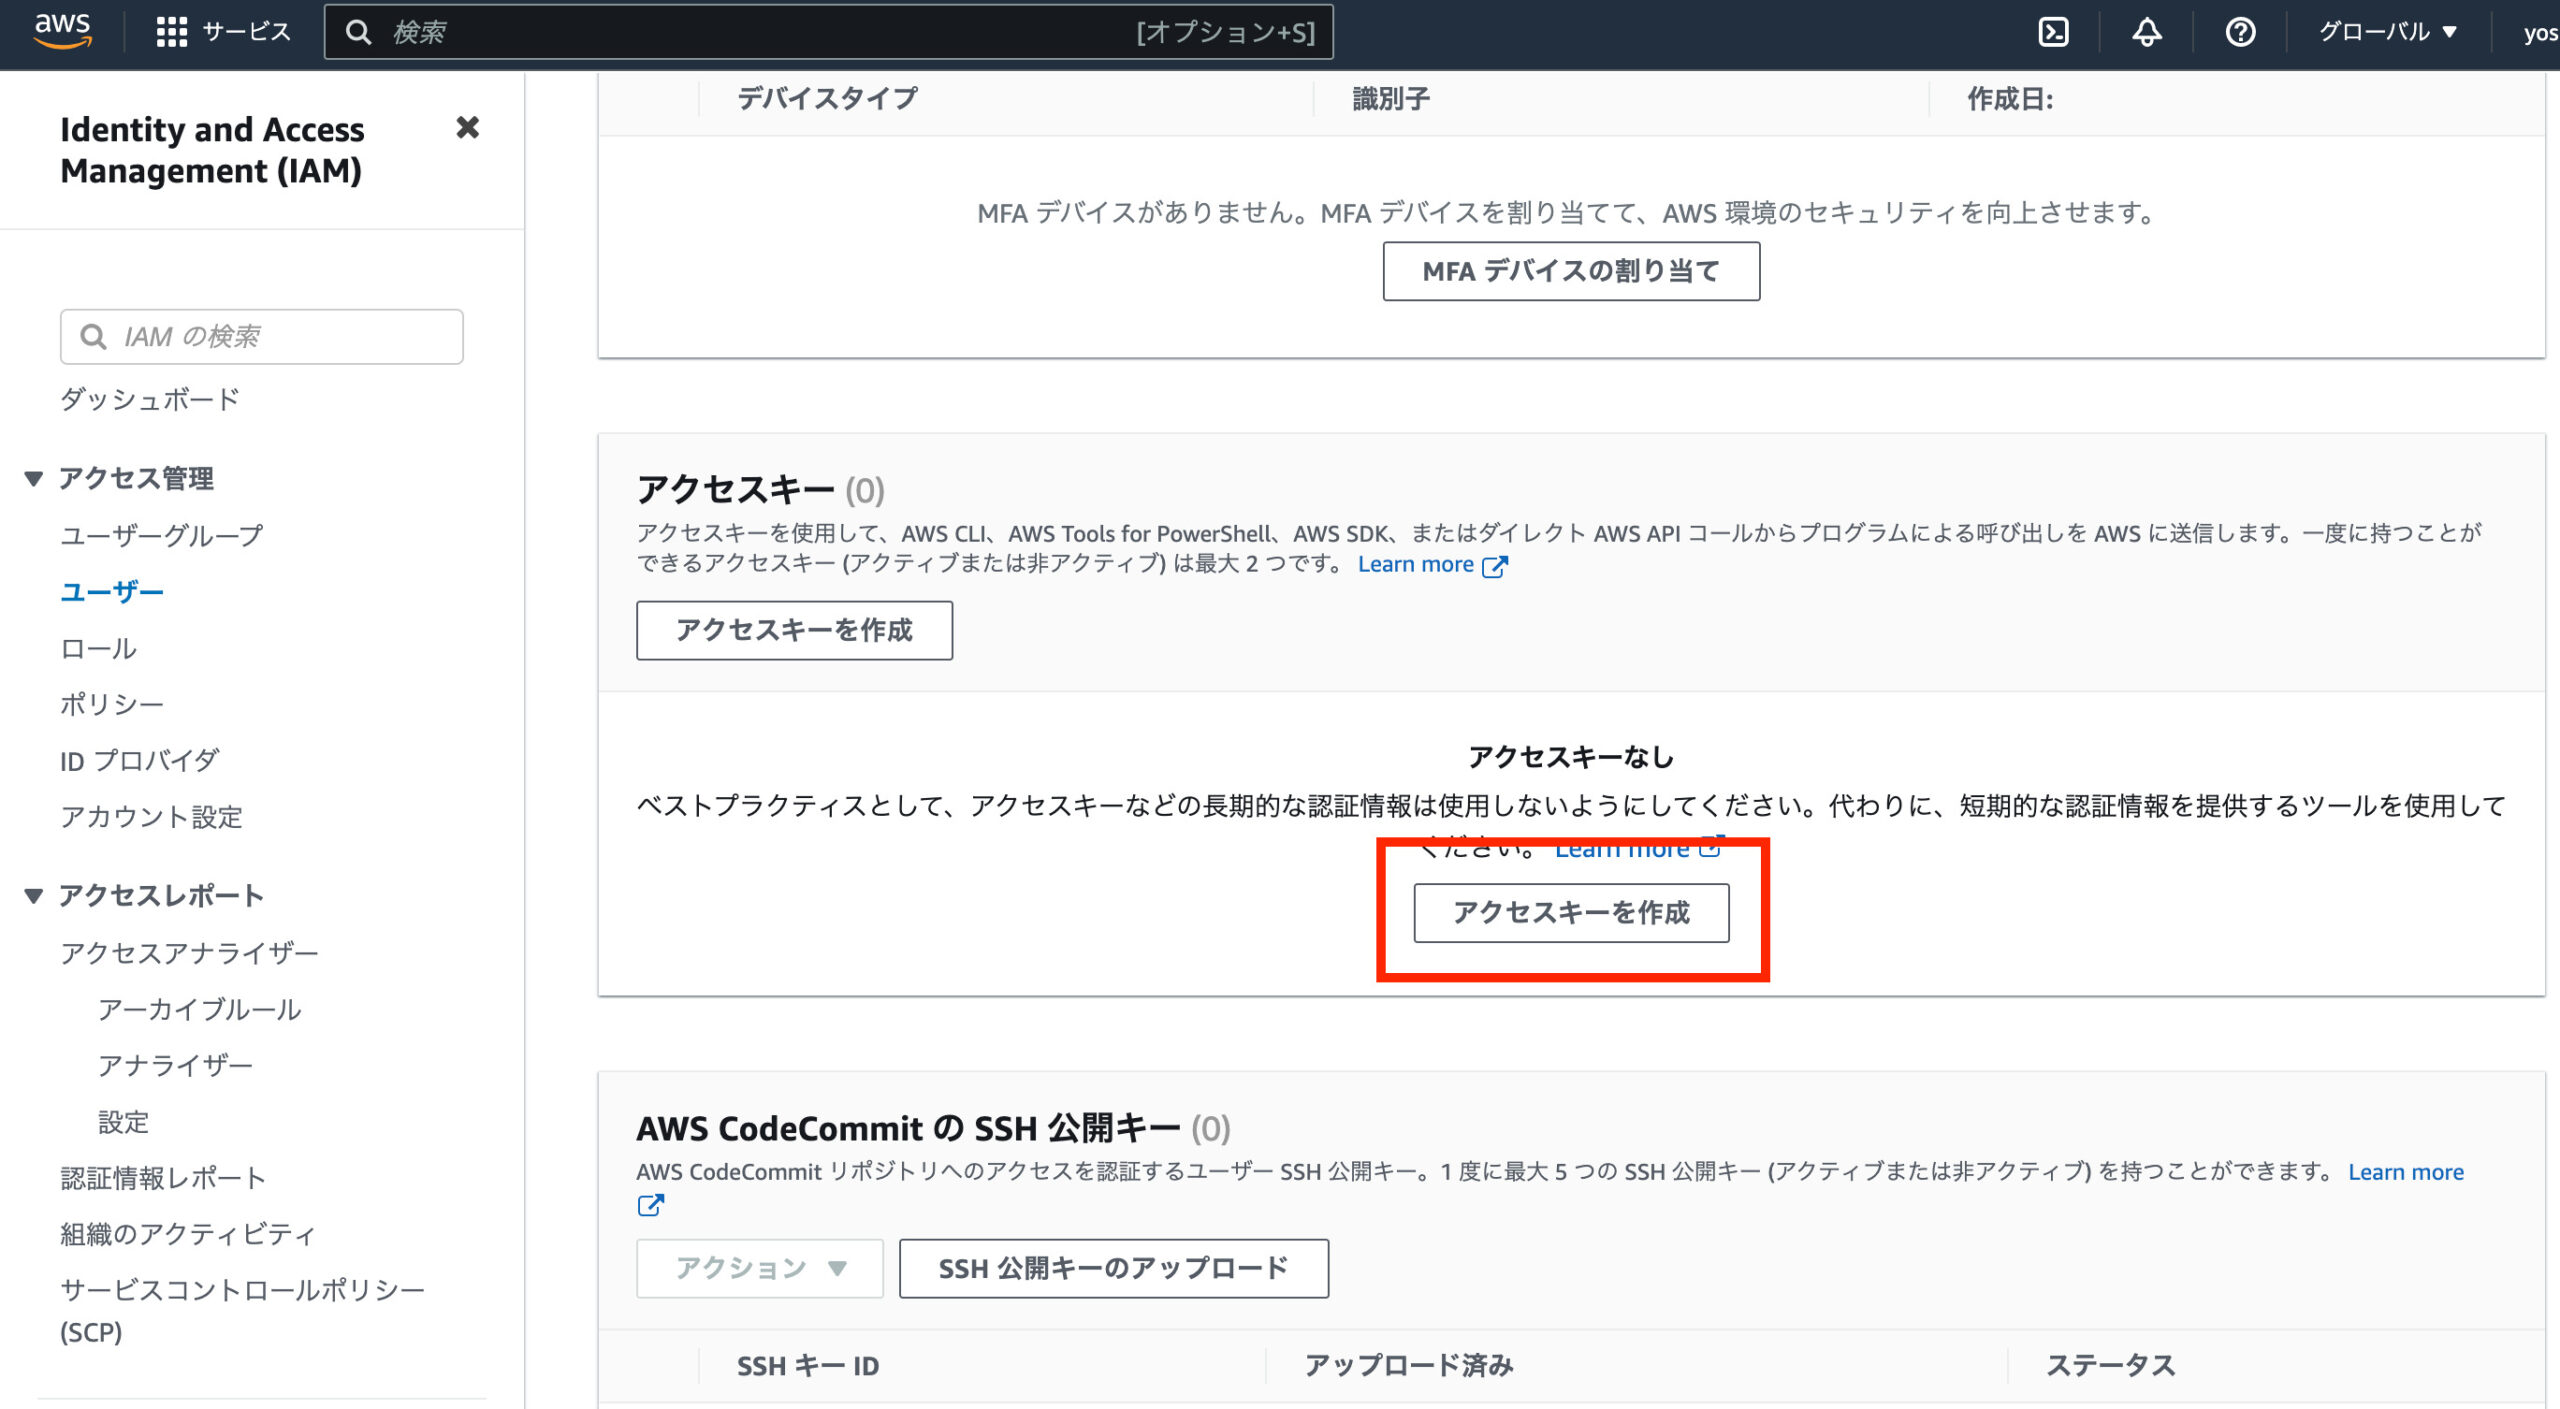
「セキュリティ認証情報」タブを選択します。
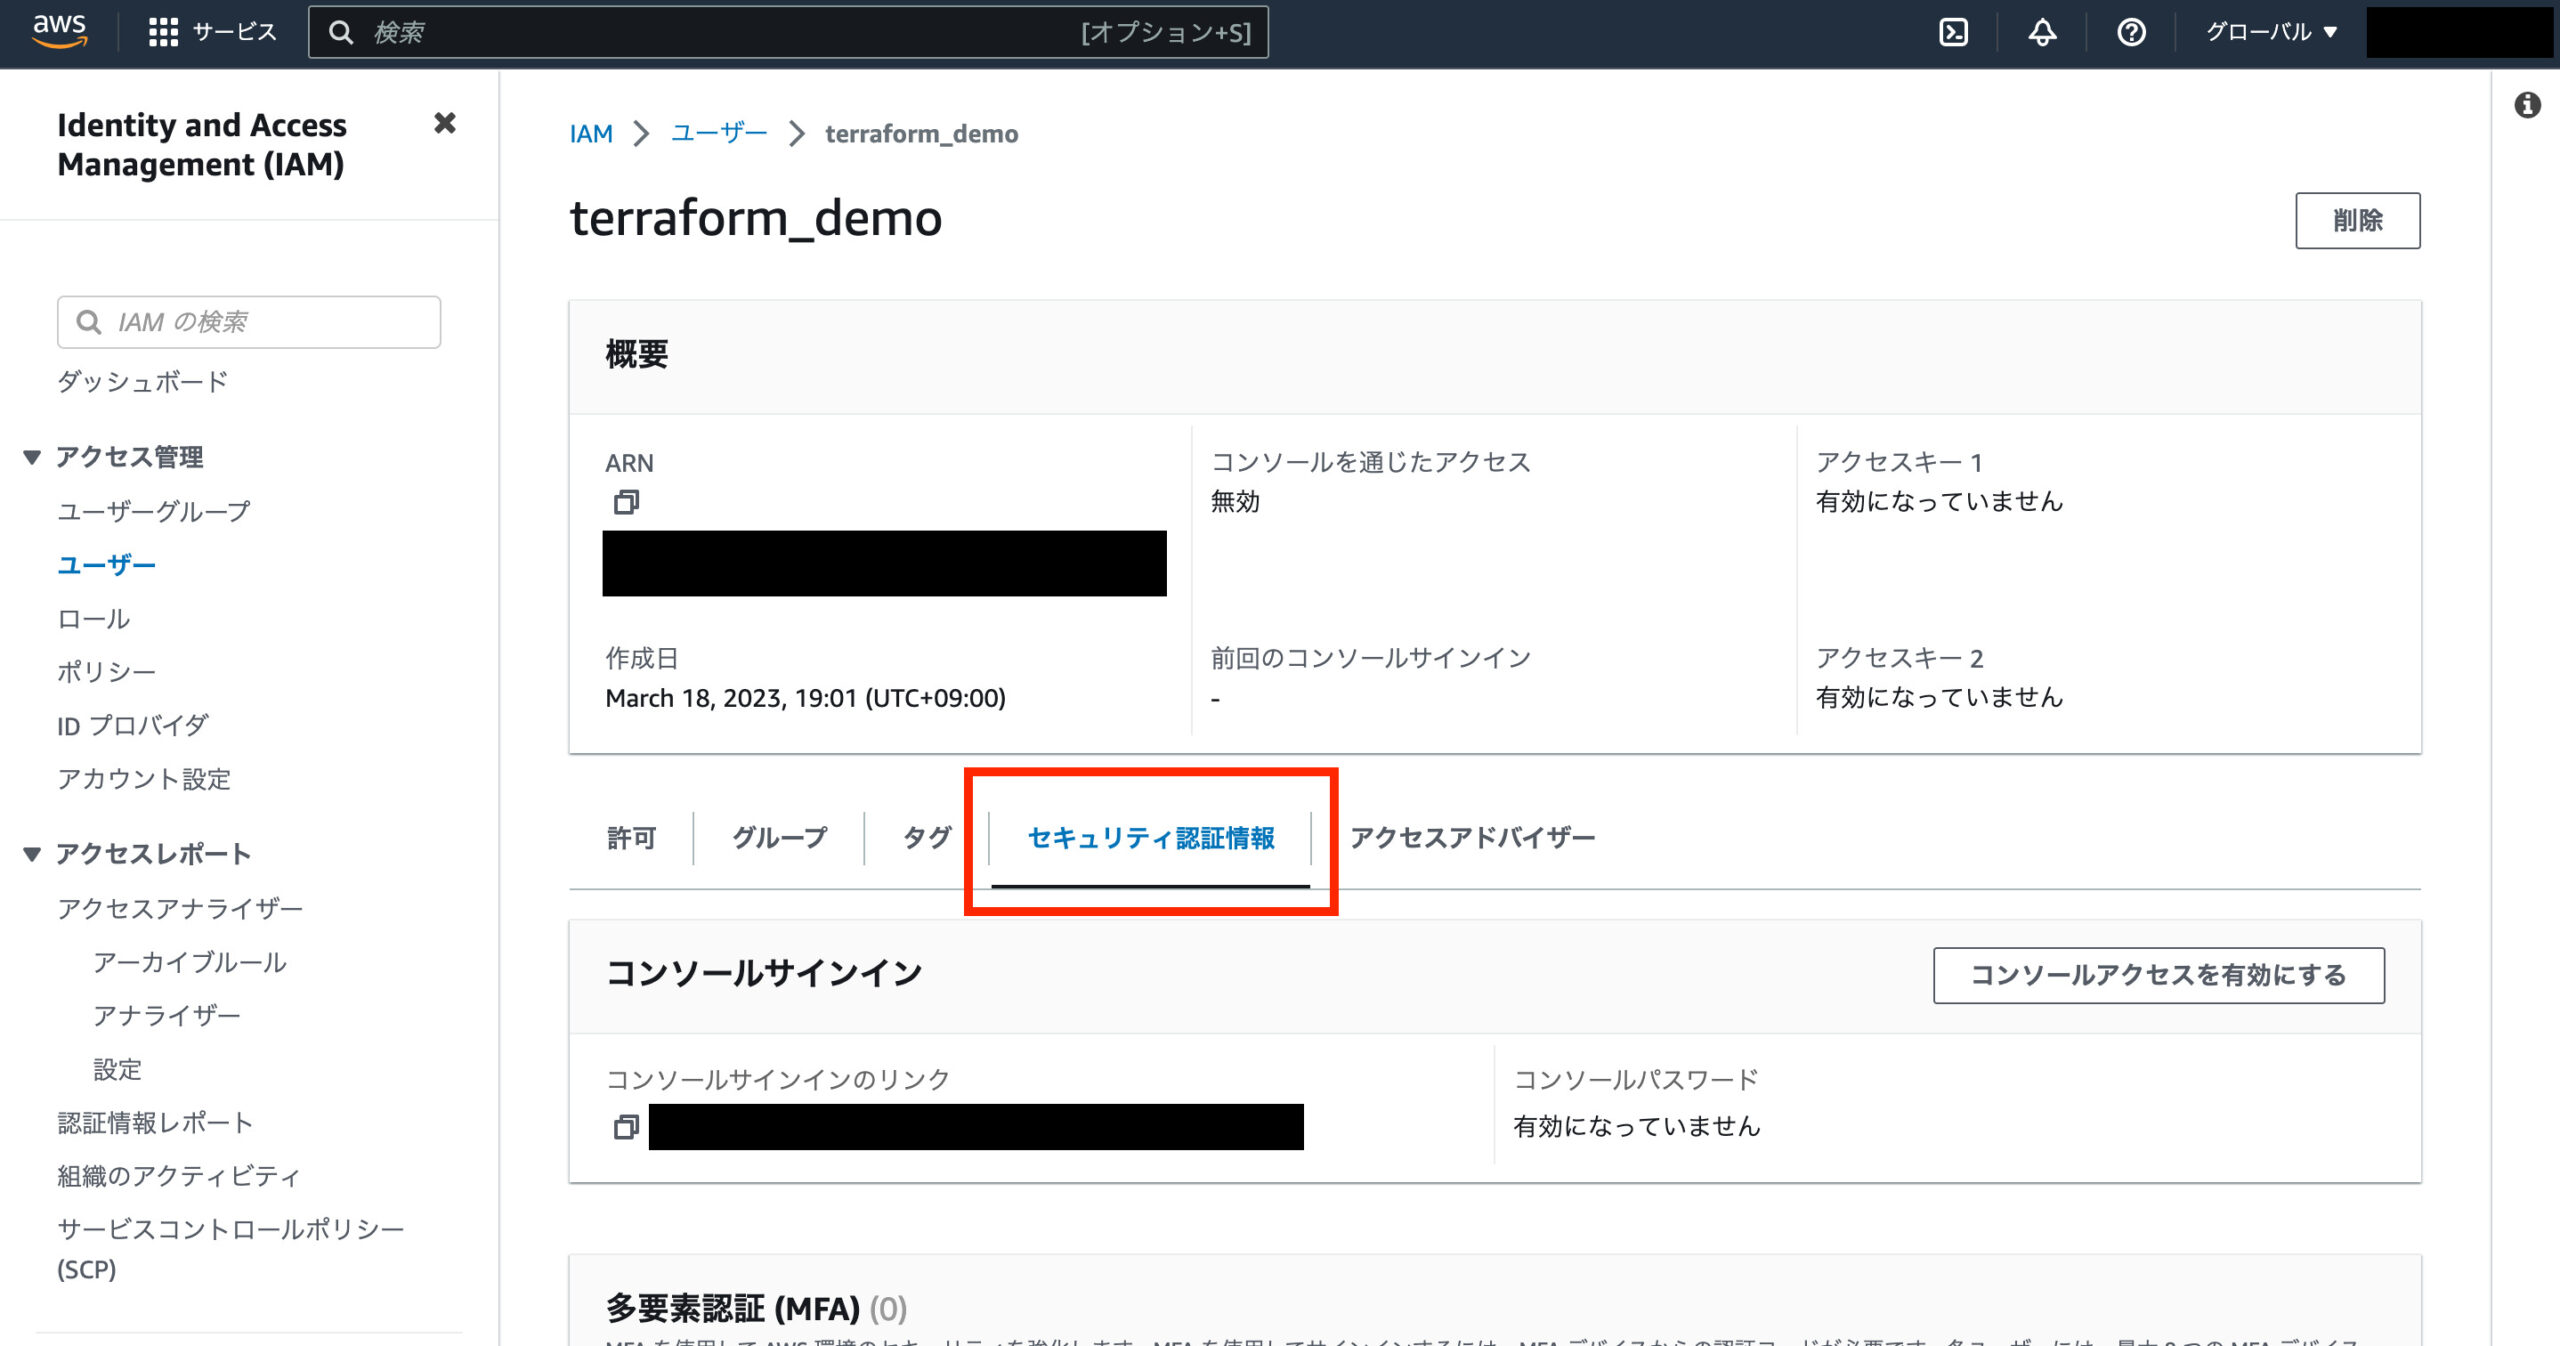
「アクセスキーを作成」をクリックします。
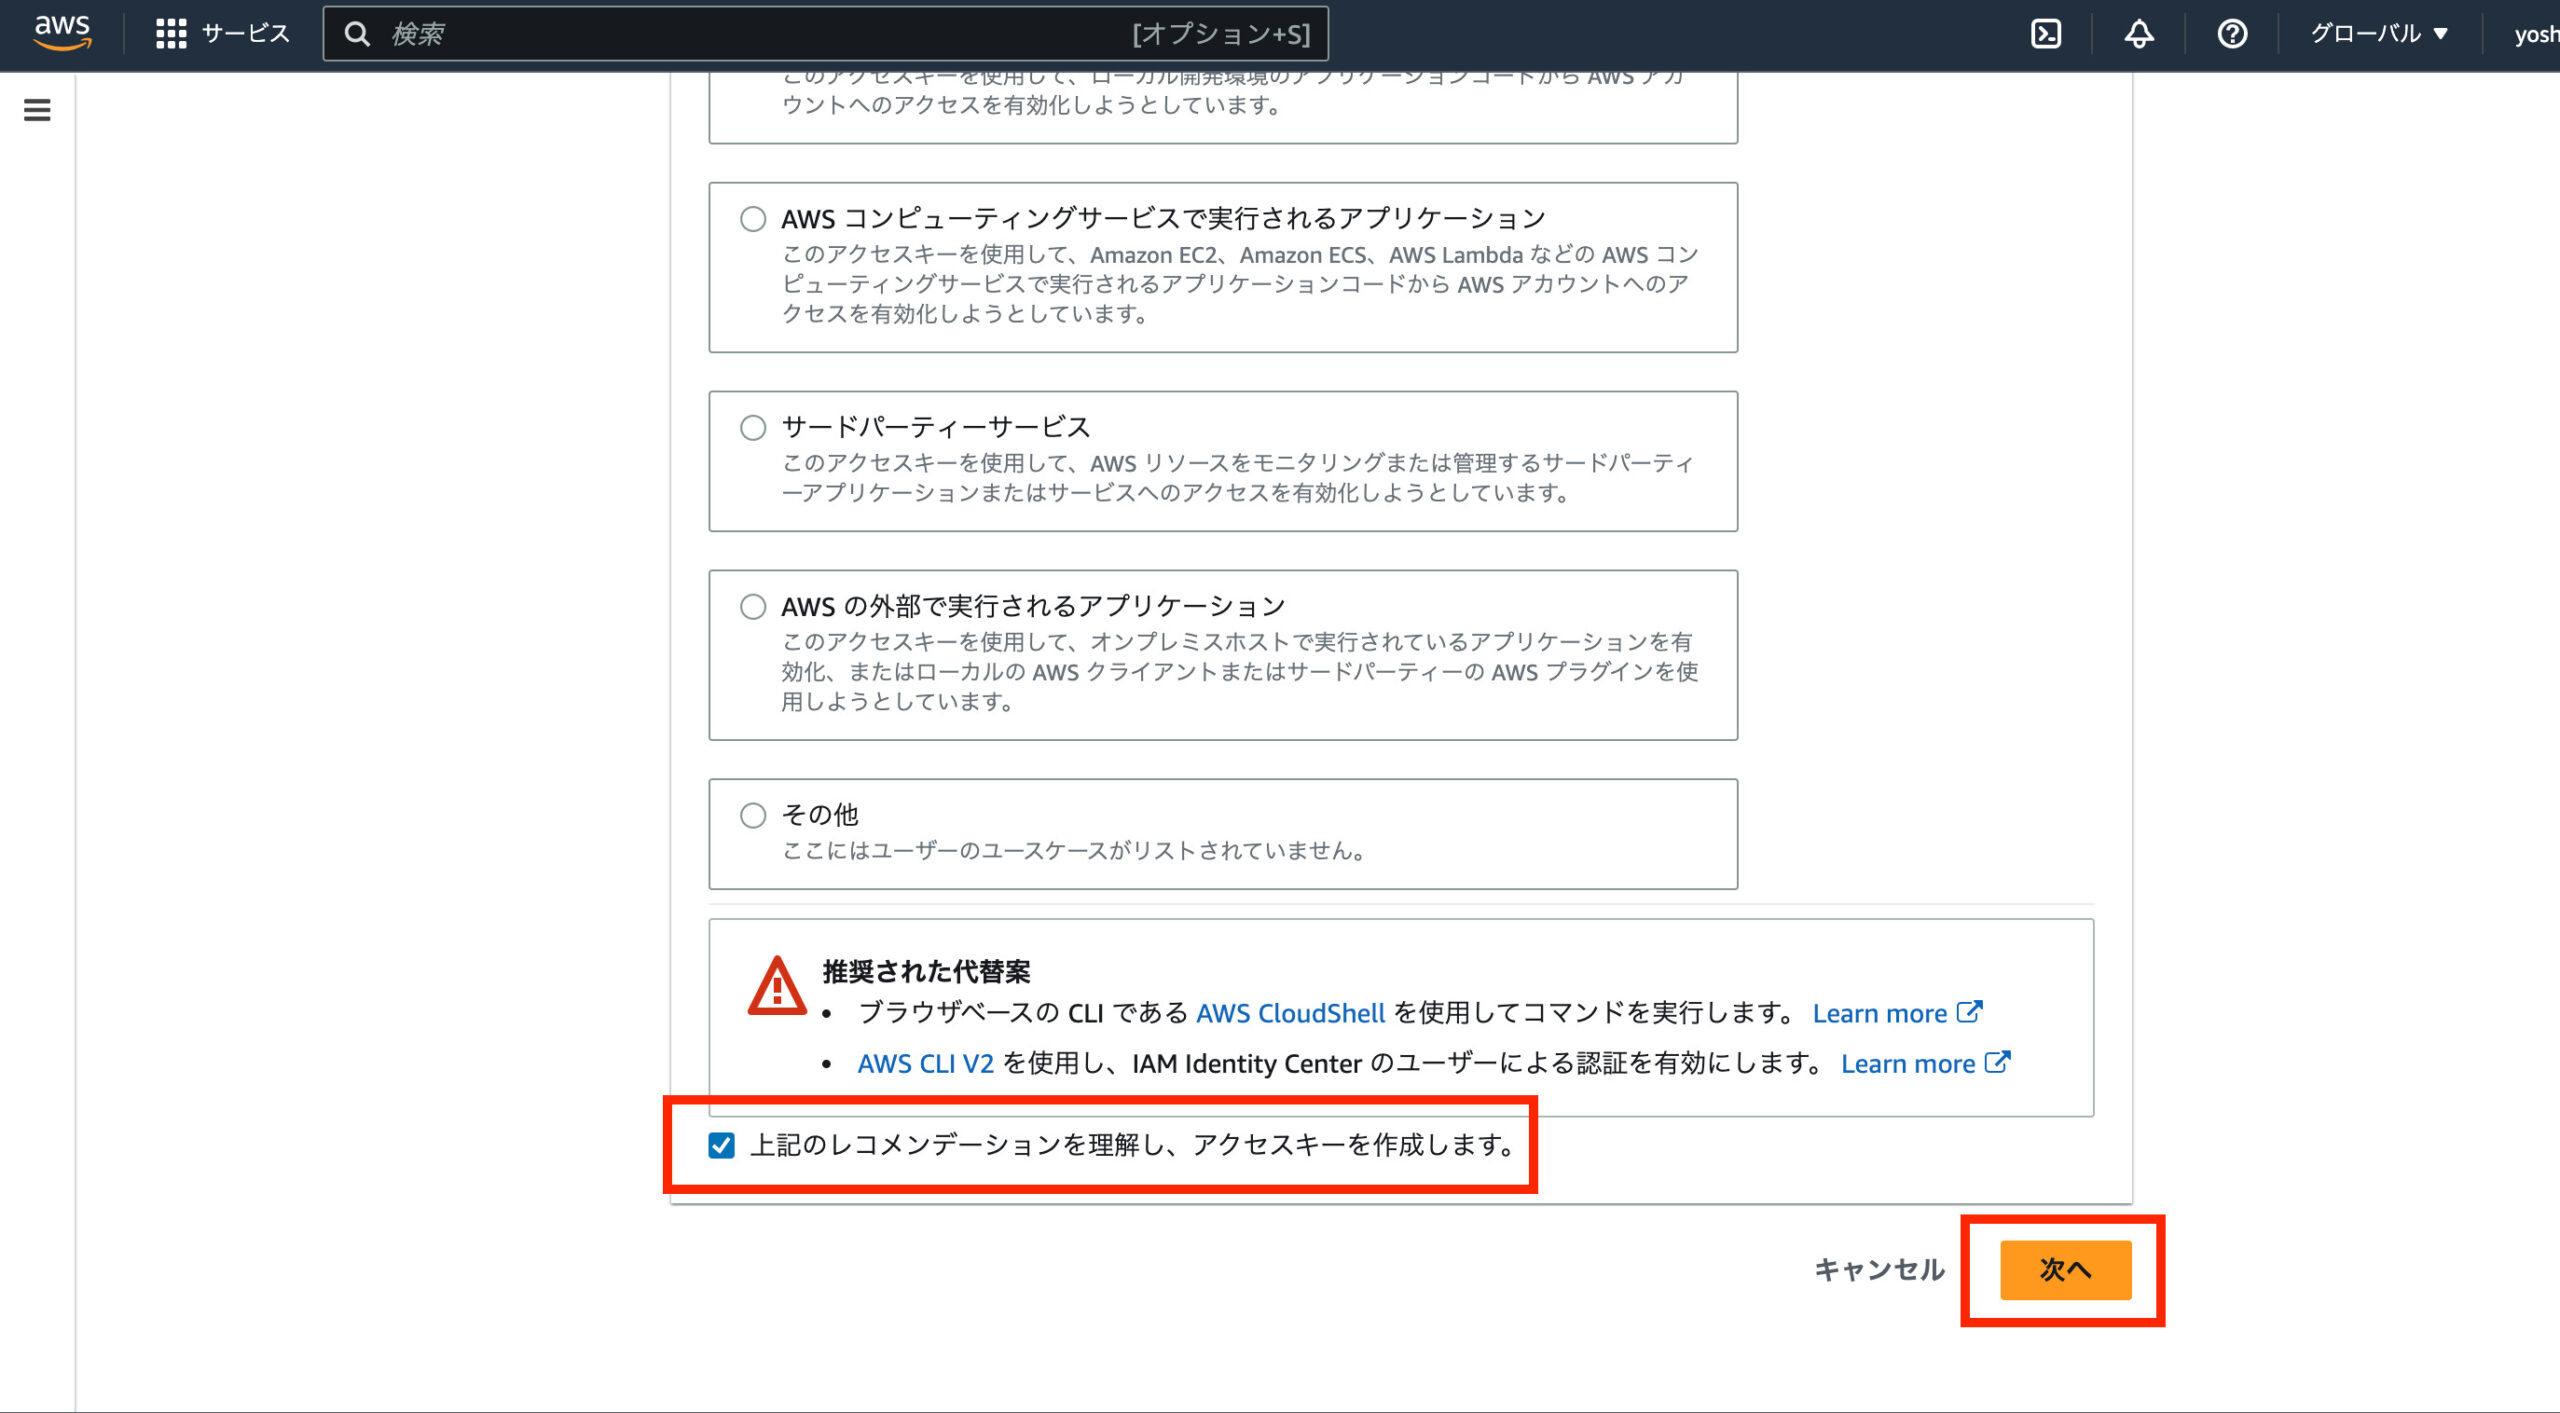
「コマンドラインインターフェイス(CLI)」を選択し、「上記のレコメンデーションを理解し、アクセスキーを作成します。」にチェックを入れ、「次へ」をクリックします。

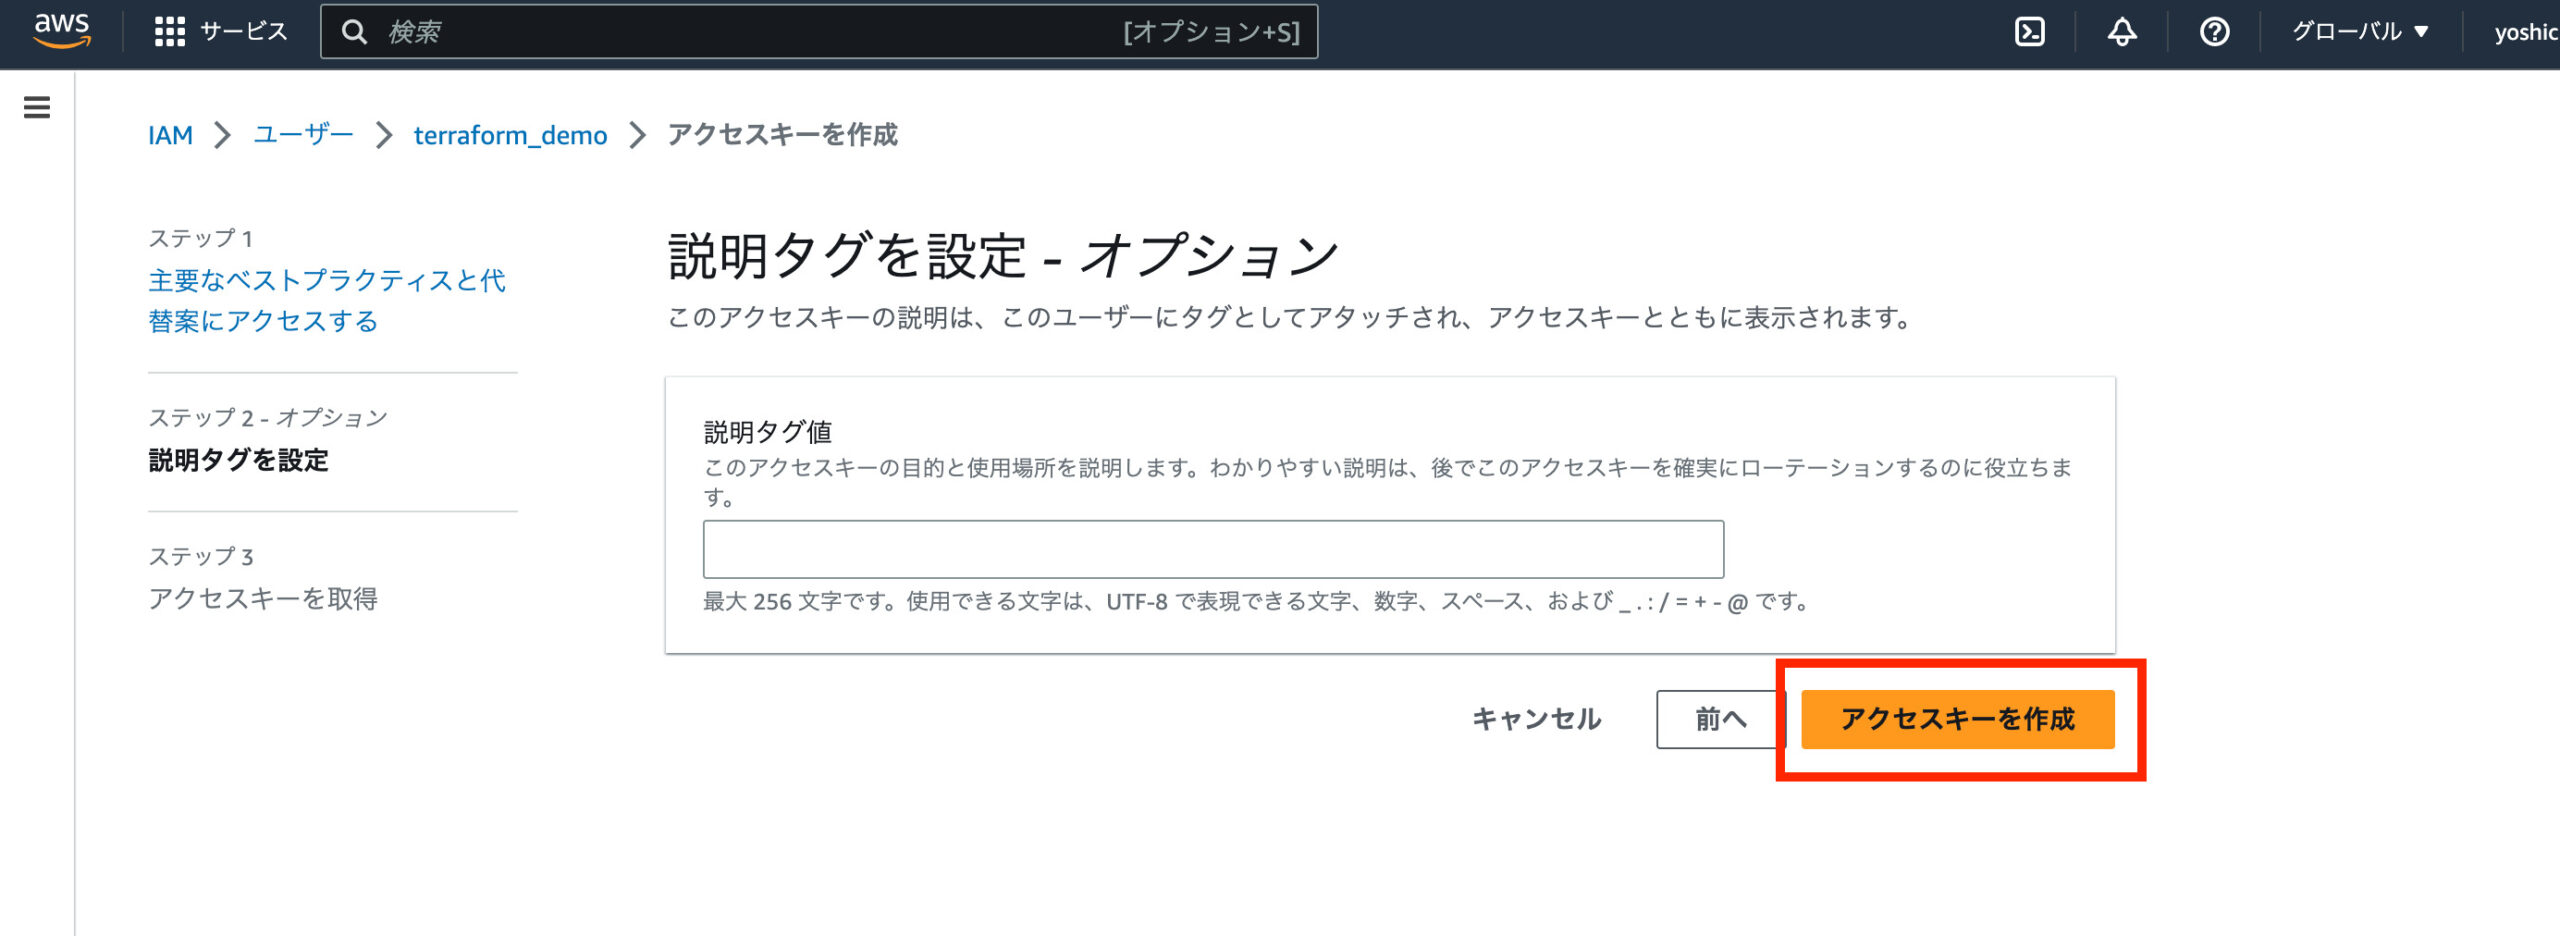
「アクセスキーを作成」をクリックします
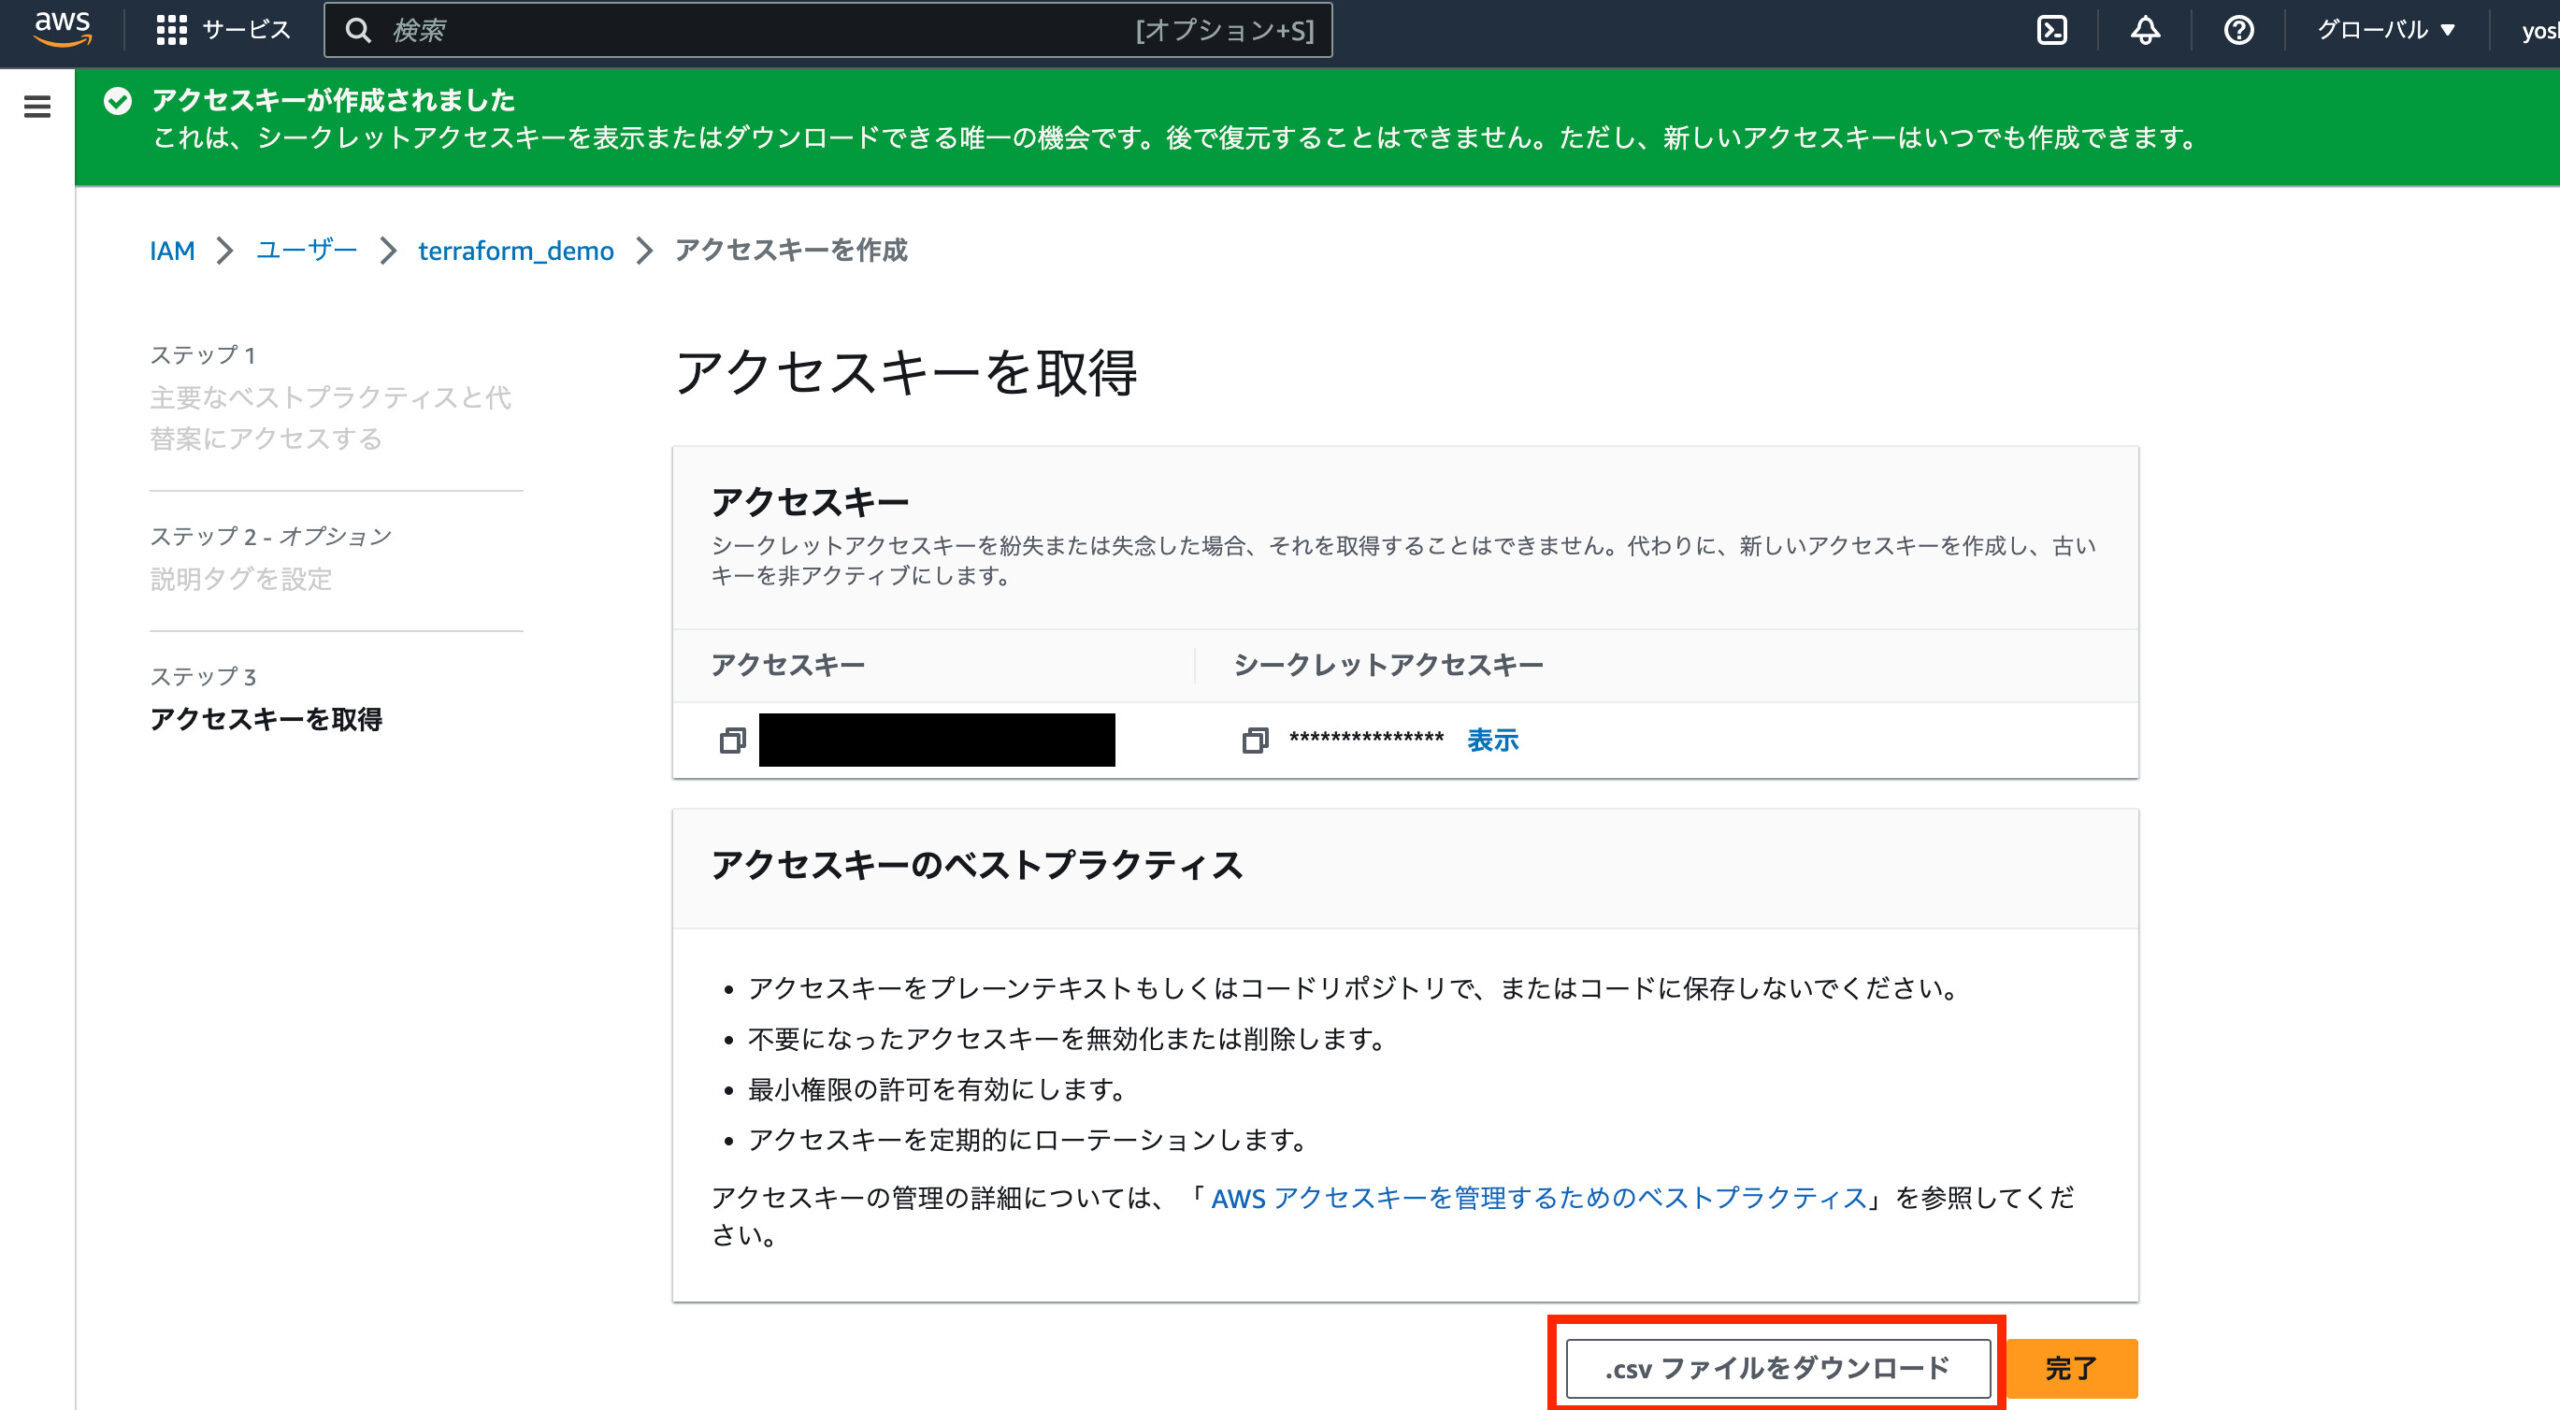
アクセスキーが記載されたcsvファイルをダウンロードし、「完了」をクリックします。
tfenvのインストール
次にtfenvをインストールします。
tfenvとはTerraformのバージョンマネージャーで、tfenvを用いることでTerraformのバージョンをCLIで切り替えることができるようになります。
参考: tfenv
% brew install tfenvTerraformのインストール
続いてtfenv list-remoteコマンドでインストール可能なTerraformのバージョンを確認します。この中から自分が使いたいバージョンを選択しインストールします。
% tfenv list-remote
1.4.2
1.4.1
1.4.0
...
0.2.0
0.1.1
0.1.0
最新の安定バージョンをインストールしたいため、今回はlatestを指定します。2023/03/19時点ではv1.4.2がインストールされました。
% tfenv install latest
Installing Terraform v1.4.2
Downloading release tarball from https://releases.hashicorp.com/terraform/1.4.2/terraform_1.4.2_darwin_amd64.zip
############################################################################################### 100.0%
Downloading SHA hash file from https://releases.hashicorp.com/terraform/1.4.2/terraform_1.4.2_SHA256SUMS
Not instructed to use Local PGP (/usr/local/Cellar/tfenv/3.0.0/use-{gpgv,gnupg}) & No keybase install found, skipping OpenPGP signature verification
Archive:  /var/folders/_g/d6rj4vq116xcr170lb61h6cc0000gn/T/tfenv_download.XXXXXX.phMmhRq5/terraform_1.4.2_darwin_amd64.zip
  inflating: /usr/local/Cellar/tfenv/3.0.0/versions/1.4.2/terraform
Installation of terraform v1.4.2 successful. To make this your default version, run 'tfenv use 1.4.2'
tfenv useコマンドでデフォルトで使用するバージョンを指定します。
% tfenv use 1.4.2
Switching default version to v1.4.2
Default version (when not overridden by .terraform-version or TFENV_TERRAFORM_VERSION) is now: 1.4.2
tfenv listコマンドとtfenv versionコマンドを使用し、インストール済みバージョンとデフォルトで使用しているバージョンを確認することができます。
% tfenv list
* 1.4.2 (set by /usr/local/Cellar/tfenv/3.0.0/version)
% terraform version
Terraform v1.4.2
on darwin_amd64tfenv installで使用したいバージョンをインストールし、tfenv useにインストールしたバージョンを指定することで、Terraformのデフォルトバージョンを切り替えることができます。
Terraform v1.4.1を使用する場合、以下のような手順になります。
% tfenv install 1.4.1
Installing Terraform v1.4.1
Downloading release tarball from https://releases.hashicorp.com/terraform/1.4.1/terraform_1.4.1_darwin_amd64.zip
############################################################################################### 100.0%
Downloading SHA hash file from https://releases.hashicorp.com/terraform/1.4.1/terraform_1.4.1_SHA256SUMS
Not instructed to use Local PGP (/usr/local/Cellar/tfenv/3.0.0/use-{gpgv,gnupg}) & No keybase install found, skipping OpenPGP signature verification
Archive:  /var/folders/_g/d6rj4vq116xcr170lb61h6cc0000gn/T/tfenv_download.XXXXXX.qVmAdLdm/terraform_1.4.1_darwin_amd64.zip
  inflating: /usr/local/Cellar/tfenv/3.0.0/versions/1.4.1/terraform
Installation of terraform v1.4.1 successful. To make this your default version, run 'tfenv use 1.4.1'

% tfenv use 1.4.1
Switching default version to v1.4.1
Default version (when not overridden by .terraform-version or TFENV_TERRAFORM_VERSION) is now: 1.4.1

% terraform version
Terraform v1.4.1
on darwin_amd64

Your version of Terraform is out of date! The latest version
is 1.4.2. You can update by downloading from https://www.terraform.io/downloads.html
AWS CLIのインストール
AWS CLI(AWS Command Line Interface)をインストールします。
AWS CLIとはAWSのサービスをコマンドラインから操作するためのツールです。AWS CLIを使用することで、AWSコンソールを使用することなくAWSのリソースを管理することができるようになります。
% brew install awscliプロファイルの作成
次にTerraformで使用するプロファイルを作成します。
プロファイルとは、AWS CLIやAWS SDKなどのAWSツールで使用される認証情報を管理するための方法です。プロファイルは、AWSのアクセスキーとシークレットキーを保存し、AWSサービスにアクセスするための認証情報を提供します。
% aws configure --profile terraform
AWS Access Key ID [None]: <csvに記載されたAWS Access Key ID>
AWS Secret Access Key [None]: <csvに記載されたAWS Secret Access Key>
Default region name [None]: ap-northeast-1
Default output format [None]:
プロファイルが正しく作成されたか、catコマンドを使用して確認します。
% cat ~/.aws/credentials
[terraform]
aws_access_key_id = <csvに記載されたAWS Access Key ID>
aws_secret_access_key = <csvに記載されたAWS Secret Access Key>構成ファイルの作成
今回は最小限の構成として東京リージョンにEC2インスタンスを立ち上げてみます。
まずは作業用のディレクトリを作成します。
% mkdir terraform_demo
% cd terraform_demo
Terraformの構成ファイルを作成します。
% touch terraform.tf# terraform.tf
terraform {
required_providers {
aws = {
source = "hashicorp/aws"
version = "~> 3.0"
}
}
required_version = ">= 1.0.0"
}
terraformブロックは、Terraform構成を定義するために使用されます。この場合、必要なTerraformバージョンが少なくとも1.0.0であることを指定しています。
required_providersブロックは、この構成に必要なプロバイダを指定するために使用されます。今回はAWSを指定しています。source属性は、プロバイダのソースを指定し、この場合はHashiCorpの公式awsプロバイダを指定しています。version属性は、使用するプロバイダのバージョンを指定しています。~>オペレータは、3.0.0以上、4.0.0未満のプロバイダのバージョンが許可されることを意味します。
全体として、この構成ファイルにより、AWSプロバイダがTerraformで使用できるようにインストールされ、Terraformの最小バージョンが満たされるようになります。
次にAWS Providerの構成ファイルを作成します。
% touch provider.tf# provider.tf
provider "aws" {
region = "ap-northeast-1"
profile = "terraform"
default_tags {
tags = {
Managed = "terraform"
}
}
}regionでリソースを作成するリージョンを指定します。今回は東京リージョンであるap-northeast-1を指定しています。
profileでAWSプロファイル名を指定します。ここでは先ほど作成したterraformを指定します。
default_tagsでは、この構成を使用して作成されるリソースにデフォルトのタグを設定します。タグの名前はManagedで、値はterraformを設定しています。
続いてEC2インスタンスの構成ファイルを作成します。
% touch ec2.tf# ec2.tf
resource "aws_instance" "demo" {
ami = "ami-0404778e217f54308"
instance_type = "t3.micro"
tags = {
Name = "tf_demo"
}
}aws_instanceリソースタイプは、AWSのEC2インスタンスを作成するために使用されます。demoという名前のリソースが作成されます。
amiパラメータは、EC2インスタンスを起動するために使用するAmazonマシンイメージ(AMI)のIDを指定します。この例では、AMI ID ami-0404778e217f54308が使用されます。
instance_typeパラメータは、起動するEC2インスタンスのインスタンスタイプを指定します。この例では、t3.microが使用されます。
tagsパラメータは、EC2インスタンスに適用するタグを指定します。この例では、タグの名前がNameで、値がtf_demoになります。
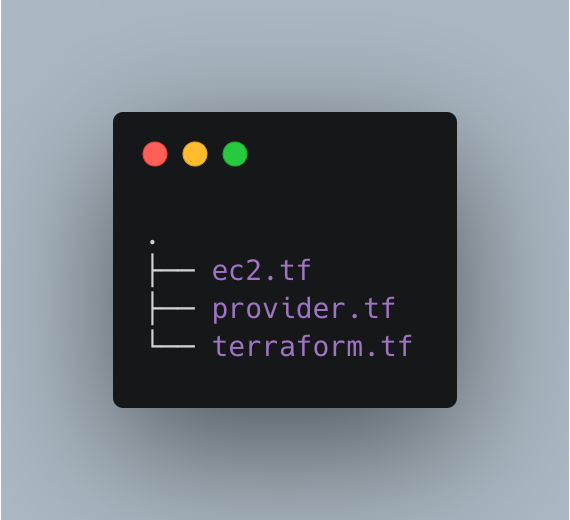
ここまでのファイル構成を確認すると以下のようになっているはずです。
コードの整形
terraform fmtを実行することでコードの整形を行なってくれるため、このタイミングで実行しておきます。
% terraform fmtリソースの作成
Terraformでリソースを作成するため、terraform init→terraform plan→terraform applyを順番に実行していきます。
% terraform init

Initializing the backend...

Initializing provider plugins...
- Finding hashicorp/aws versions matching "~> 3.0"...
- Installing hashicorp/aws v3.76.1...
- Installed hashicorp/aws v3.76.1 (signed by HashiCorp)

Terraform has created a lock file .terraform.lock.hcl to record the provider
selections it made above. Include this file in your version control repository
so that Terraform can guarantee to make the same selections by default when
you run "terraform init" in the future.

Terraform has been successfully initialized!

You may now begin working with Terraform. Try running "terraform plan" to see
any changes that are required for your infrastructure. All Terraform commands
should now work.

If you ever set or change modules or backend configuration for Terraform,
rerun this command to reinitialize your working directory. If you forget, other
commands will detect it and remind you to do so if necessary.
terraform initはTerraformの初期化処理を行います。このコマンドはTerraformが必要とするプラグインやモジュールをダウンロードするために使用されます。
% terraform plan

Terraform used the selected providers to generate the following execution plan. Resource actions are
indicated with the following symbols:
  + create

Terraform will perform the following actions:

  # aws_instance.demo will be created
  + resource "aws_instance" "demo" {
      + ami                                  = "ami-0404778e217f54308"
      + arn                                  = (known after apply)
      + associate_public_ip_address          = (known after apply)
      + availability_zone                    = (known after apply)
      + cpu_core_count                       = (known after apply)
      + cpu_threads_per_core                 = (known after apply)
      + disable_api_termination              = (known after apply)
      + ebs_optimized                        = (known after apply)
      + get_password_data                    = false
      + host_id                              = (known after apply)
      + id                                   = (known after apply)
      + instance_initiated_shutdown_behavior = (known after apply)
      + instance_state                       = (known after apply)
      + instance_type                        = "t3.micro"
      + ipv6_address_count                   = (known after apply)
      + ipv6_addresses                       = (known after apply)
      + key_name                             = (known after apply)
      + monitoring                           = (known after apply)
      + outpost_arn                          = (known after apply)
      + password_data                        = (known after apply)
      + placement_group                      = (known after apply)
      + placement_partition_number           = (known after apply)
      + primary_network_interface_id         = (known after apply)
      + private_dns                          = (known after apply)
      + private_ip                           = (known after apply)
      + public_dns                           = (known after apply)
      + public_ip                            = (known after apply)
      + secondary_private_ips                = (known after apply)
      + security_groups                      = (known after apply)
      + source_dest_check                    = true
      + subnet_id                            = (known after apply)
      + tags                                 = {
          + "Name" = "tf_demo"
        }
      + tags_all                             = {
          + "Managed" = "terraform"
          + "Name"    = "tf_demo"
        }
      + tenancy                              = (known after apply)
      + user_data                            = (known after apply)
      + user_data_base64                     = (known after apply)
      + vpc_security_group_ids               = (known after apply)
    }

Plan: 1 to add, 0 to change, 0 to destroy.

─────────────────────────────────────────────────────────────────────────────────────────────────────

Note: You didn't use the -out option to save this plan, so Terraform can't guarantee to take exactly
these actions if you run "terraform apply" now.
terraform planはTerraformの実行計画を作成します。このコマンドは現在のインフラストラクチャの状態と定義されたコードの状態を比較し、どのような変更が必要かを示します。
% terraform apply

Terraform used the selected providers to generate the following execution plan. Resource actions are
indicated with the following symbols:
  + create

Terraform will perform the following actions:

  # aws_instance.demo will be created
  + resource "aws_instance" "demo" {
      + ami                                  = "ami-0404778e217f54308"
      + arn                                  = (known after apply)
      + associate_public_ip_address          = (known after apply)
      + availability_zone                    = (known after apply)
      + cpu_core_count                       = (known after apply)
      + cpu_threads_per_core                 = (known after apply)
      + disable_api_termination              = (known after apply)
      + ebs_optimized                        = (known after apply)
      + get_password_data                    = false
      + host_id                              = (known after apply)
      + id                                   = (known after apply)
      + instance_initiated_shutdown_behavior = (known after apply)
      + instance_state                       = (known after apply)
      + instance_type                        = "t3.micro"
      + ipv6_address_count                   = (known after apply)
      + ipv6_addresses                       = (known after apply)
      + key_name                             = (known after apply)
      + monitoring                           = (known after apply)
      + outpost_arn                          = (known after apply)
      + password_data                        = (known after apply)
      + placement_group                      = (known after apply)
      + placement_partition_number           = (known after apply)
      + primary_network_interface_id         = (known after apply)
      + private_dns                          = (known after apply)
      + private_ip                           = (known after apply)
      + public_dns                           = (known after apply)
      + public_ip                            = (known after apply)
      + secondary_private_ips                = (known after apply)
      + security_groups                      = (known after apply)
      + source_dest_check                    = true
      + subnet_id                            = (known after apply)
      + tags                                 = {
          + "Name" = "tf_demo"
        }
      + tags_all                             = {
          + "Managed" = "terraform"
          + "Name"    = "tf_demo"
        }
      + tenancy                              = (known after apply)
      + user_data                            = (known after apply)
      + user_data_base64                     = (known after apply)
      + vpc_security_group_ids               = (known after apply)
    }

Plan: 1 to add, 0 to change, 0 to destroy.

Do you want to perform these actions?
  Terraform will perform the actions described above.
  Only 'yes' will be accepted to approve.

  Enter a value: yes

aws_instance.demo: Creating...
aws_instance.demo: Still creating... [10s elapsed]
aws_instance.demo: Creation complete after 15s [id=i-090dd1b2b111d5690]

Apply complete! Resources: 1 added, 0 changed, 0 destroyed.terraform applyは実際にインフラストラクチャを変更するために使用されます。このコマンドを実行するとTerraformはterraform planコマンドで作成された計画を使用して、リソースを作成・更新・削除を実行します。
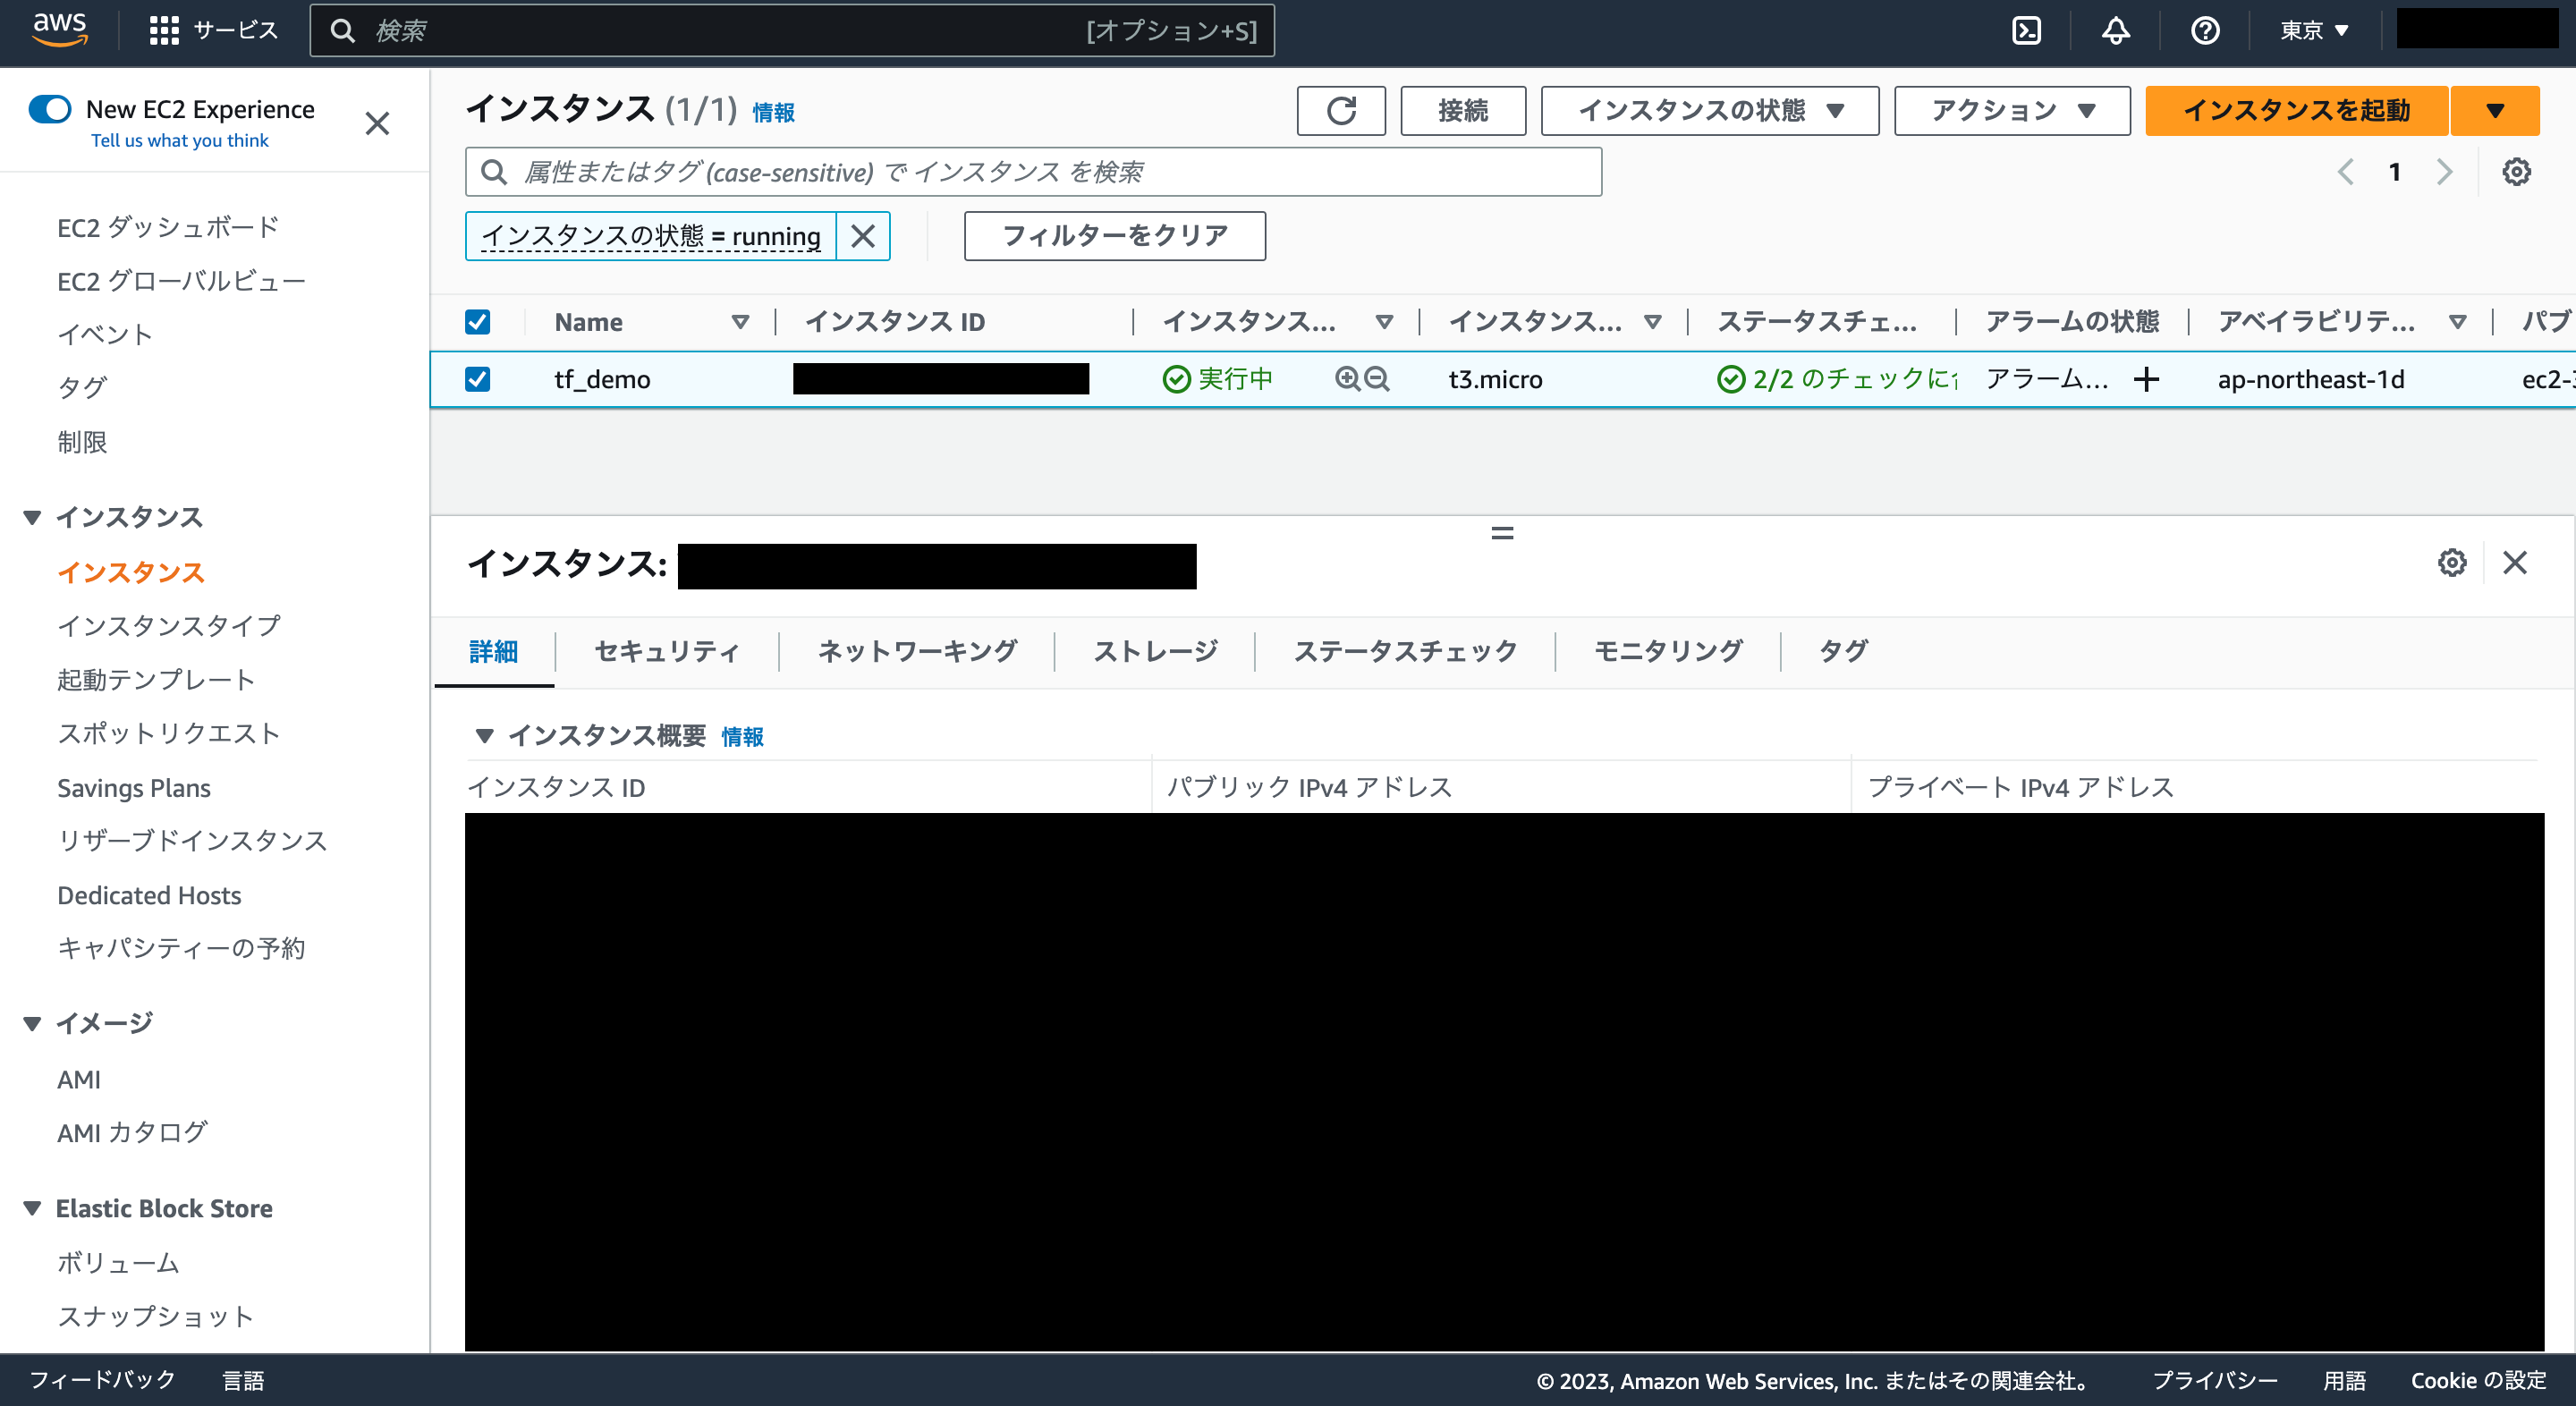
作成したインスタンスの確認
AWSコンソールのEC2ページからインスタンスが作成されていることが確認できます。
terraform showコマンドでもインスタンス情報を確認できます。
% terraform show

# aws_instance.demo:
resource "aws_instance" "demo" {
    ami                                  = "ami-0404778e217f54308"
    arn                                  = "arn:aws:ec2:ap-northeast-1:330482479074:instance/i-090dd1b2b111d5690"
    associate_public_ip_address          = true
    availability_zone                    = "ap-northeast-1d"
    cpu_core_count                       = 1
    cpu_threads_per_core                 = 2
    disable_api_termination              = false
    ebs_optimized                        = false
    get_password_data                    = false
    hibernation                          = false
    id                                   = "i-090dd1b2b111d5690"
    instance_initiated_shutdown_behavior = "stop"
    instance_state                       = "running"
    instance_type                        = "t3.micro"
    ipv6_address_count                   = 0
    ipv6_addresses                       = []
    monitoring                           = false
    primary_network_interface_id         = "eni-01f7b58daef857e42"
    private_dns                          = "ip-172-31-23-1.ap-northeast-1.compute.internal"
    private_ip                           = "172.31.23.1"
    public_dns                           = "ec2-35-74-64-197.ap-northeast-1.compute.amazonaws.com"
    public_ip                            = "35.74.64.197"
    secondary_private_ips                = []
    security_groups                      = [
        "default",
    ]
    source_dest_check                    = true
    subnet_id                            = "subnet-0a7e8cdf20caf040a"
    tags                                 = {
        "Name" = "tf_demo"
    }
    tags_all                             = {
        "Managed" = "terraform"
        "Name"    = "tf_demo"
    }
    tenancy                              = "default"
    vpc_security_group_ids               = [
        "sg-07baaee09217494fd",
    ]

    capacity_reservation_specification {
        capacity_reservation_preference = "open"
    }

    credit_specification {
        cpu_credits = "unlimited"
    }

    enclave_options {
        enabled = false
    }

    metadata_options {
        http_endpoint               = "enabled"
        http_put_response_hop_limit = 1
        http_tokens                 = "optional"
        instance_metadata_tags      = "disabled"
    }

    root_block_device {
        delete_on_termination = true
        device_name           = "/dev/xvda"
        encrypted             = false
        iops                  = 100
        tags                  = {}
        throughput            = 0
        volume_id             = "vol-0fc202afd855b4385"
        volume_size           = 8
        volume_type           = "gp2"
    }
}
リソースの削除
AWSの利用料が発生してしまうためリソースを削除します。
まずはterraform plan -destroy コマンドで削除されるリソースを確認します。
% terraform plan -destroy

aws_instance.demo: Refreshing state... [id=i-090dd1b2b111d5690]

Terraform used the selected providers to generate the following execution plan. Resource actions are
indicated with the following symbols:
  - destroy

Terraform will perform the following actions:

  # aws_instance.demo will be destroyed
  - resource "aws_instance" "demo" {
      - ami                                  = "ami-0404778e217f54308" -> null
      - arn                                  = "arn:aws:ec2:ap-northeast-1:330482479074:instance/i-090dd1b2b111d5690" -> null
      - associate_public_ip_address          = true -> null
      - availability_zone                    = "ap-northeast-1d" -> null
      - cpu_core_count                       = 1 -> null
      - cpu_threads_per_core                 = 2 -> null
      - disable_api_termination              = false -> null
      - ebs_optimized                        = false -> null
      - get_password_data                    = false -> null
      - hibernation                          = false -> null
      - id                                   = "i-090dd1b2b111d5690" -> null
      - instance_initiated_shutdown_behavior = "stop" -> null
      - instance_state                       = "running" -> null
      - instance_type                        = "t3.micro" -> null
      - ipv6_address_count                   = 0 -> null
      - ipv6_addresses                       = [] -> null
      - monitoring                           = false -> null
      - primary_network_interface_id         = "eni-01f7b58daef857e42" -> null
      - private_dns                          = "ip-172-31-23-1.ap-northeast-1.compute.internal" -> null
      - private_ip                           = "172.31.23.1" -> null
      - public_dns                           = "ec2-35-74-64-197.ap-northeast-1.compute.amazonaws.com" -> null
      - public_ip                            = "35.74.64.197" -> null
      - secondary_private_ips                = [] -> null
      - security_groups                      = [
          - "default",
        ] -> null
      - source_dest_check                    = true -> null
      - subnet_id                            = "subnet-0a7e8cdf20caf040a" -> null
      - tags                                 = {
          - "Name" = "tf_demo"
        } -> null
      - tags_all                             = {
          - "Managed" = "terraform"
          - "Name"    = "tf_demo"
        } -> null
      - tenancy                              = "default" -> null
      - vpc_security_group_ids               = [
          - "sg-07baaee09217494fd",
        ] -> null

      - capacity_reservation_specification {
          - capacity_reservation_preference = "open" -> null
        }

      - credit_specification {
          - cpu_credits = "unlimited" -> null
        }

      - enclave_options {
          - enabled = false -> null
        }

      - metadata_options {
          - http_endpoint               = "enabled" -> null
          - http_put_response_hop_limit = 1 -> null
          - http_tokens                 = "optional" -> null
          - instance_metadata_tags      = "disabled" -> null
        }

      - root_block_device {
          - delete_on_termination = true -> null
          - device_name           = "/dev/xvda" -> null
          - encrypted             = false -> null
          - iops                  = 100 -> null
          - tags                  = {} -> null
          - throughput            = 0 -> null
          - volume_id             = "vol-0fc202afd855b4385" -> null
          - volume_size           = 8 -> null
          - volume_type           = "gp2" -> null
        }
    }

Plan: 0 to add, 0 to change, 1 to destroy.

─────────────────────────────────────────────────────────────────────────────────────────────────────

Note: You didn't use the -out option to save this plan, so Terraform can't guarantee to take exactly
these actions if you run "terraform apply" now.
terraform destroyコマンドを実行し、リソースを削除します。
% terraform destroy
aws_instance.demo: Refreshing state... [id=i-090dd1b2b111d5690]

Terraform used the selected providers to generate the following execution plan. Resource actions are
indicated with the following symbols:
  - destroy

Terraform will perform the following actions:

  # aws_instance.demo will be destroyed
  - resource "aws_instance" "demo" {
      - ami                                  = "ami-0404778e217f54308" -> null
      - arn                                  = "arn:aws:ec2:ap-northeast-1:330482479074:instance/i-090dd1b2b111d5690" -> null
      - associate_public_ip_address          = true -> null
      - availability_zone                    = "ap-northeast-1d" -> null
      - cpu_core_count                       = 1 -> null
      - cpu_threads_per_core                 = 2 -> null
      - disable_api_termination              = false -> null
      - ebs_optimized                        = false -> null
      - get_password_data                    = false -> null
      - hibernation                          = false -> null
      - id                                   = "i-090dd1b2b111d5690" -> null
      - instance_initiated_shutdown_behavior = "stop" -> null
      - instance_state                       = "running" -> null
      - instance_type                        = "t3.micro" -> null
      - ipv6_address_count                   = 0 -> null
      - ipv6_addresses                       = [] -> null
      - monitoring                           = false -> null
      - primary_network_interface_id         = "eni-01f7b58daef857e42" -> null
      - private_dns                          = "ip-172-31-23-1.ap-northeast-1.compute.internal" -> null
      - private_ip                           = "172.31.23.1" -> null
      - public_dns                           = "ec2-35-74-64-197.ap-northeast-1.compute.amazonaws.com" -> null
      - public_ip                            = "35.74.64.197" -> null
      - secondary_private_ips                = [] -> null
      - security_groups                      = [
          - "default",
        ] -> null
      - source_dest_check                    = true -> null
      - subnet_id                            = "subnet-0a7e8cdf20caf040a" -> null
      - tags                                 = {
          - "Name" = "tf_demo"
        } -> null
      - tags_all                             = {
          - "Managed" = "terraform"
          - "Name"    = "tf_demo"
        } -> null
      - tenancy                              = "default" -> null
      - vpc_security_group_ids               = [
          - "sg-07baaee09217494fd",
        ] -> null

      - capacity_reservation_specification {
          - capacity_reservation_preference = "open" -> null
        }

      - credit_specification {
          - cpu_credits = "unlimited" -> null
        }

      - enclave_options {
          - enabled = false -> null
        }

      - metadata_options {
          - http_endpoint               = "enabled" -> null
          - http_put_response_hop_limit = 1 -> null
          - http_tokens                 = "optional" -> null
          - instance_metadata_tags      = "disabled" -> null
        }

      - root_block_device {
          - delete_on_termination = true -> null
          - device_name           = "/dev/xvda" -> null
          - encrypted             = false -> null
          - iops                  = 100 -> null
          - tags                  = {} -> null
          - throughput            = 0 -> null
          - volume_id             = "vol-0fc202afd855b4385" -> null
          - volume_size           = 8 -> null
          - volume_type           = "gp2" -> null
        }
    }

Plan: 0 to add, 0 to change, 1 to destroy.

Do you really want to destroy all resources?
  Terraform will destroy all your managed infrastructure, as shown above.
  There is no undo. Only 'yes' will be accepted to confirm.

  Enter a value: yes

aws_instance.demo: Destroying... [id=i-090dd1b2b111d5690]
aws_instance.demo: Still destroying... [id=i-090dd1b2b111d5690, 10s elapsed]
aws_instance.demo: Still destroying... [id=i-090dd1b2b111d5690, 20s elapsed]
aws_instance.demo: Still destroying... [id=i-090dd1b2b111d5690, 30s elapsed]
aws_instance.demo: Still destroying... [id=i-090dd1b2b111d5690, 40s elapsed]
aws_instance.demo: Still destroying... [id=i-090dd1b2b111d5690, 50s elapsed]
aws_instance.demo: Destruction complete after 52s

Destroy complete! Resources: 1 destroyed.
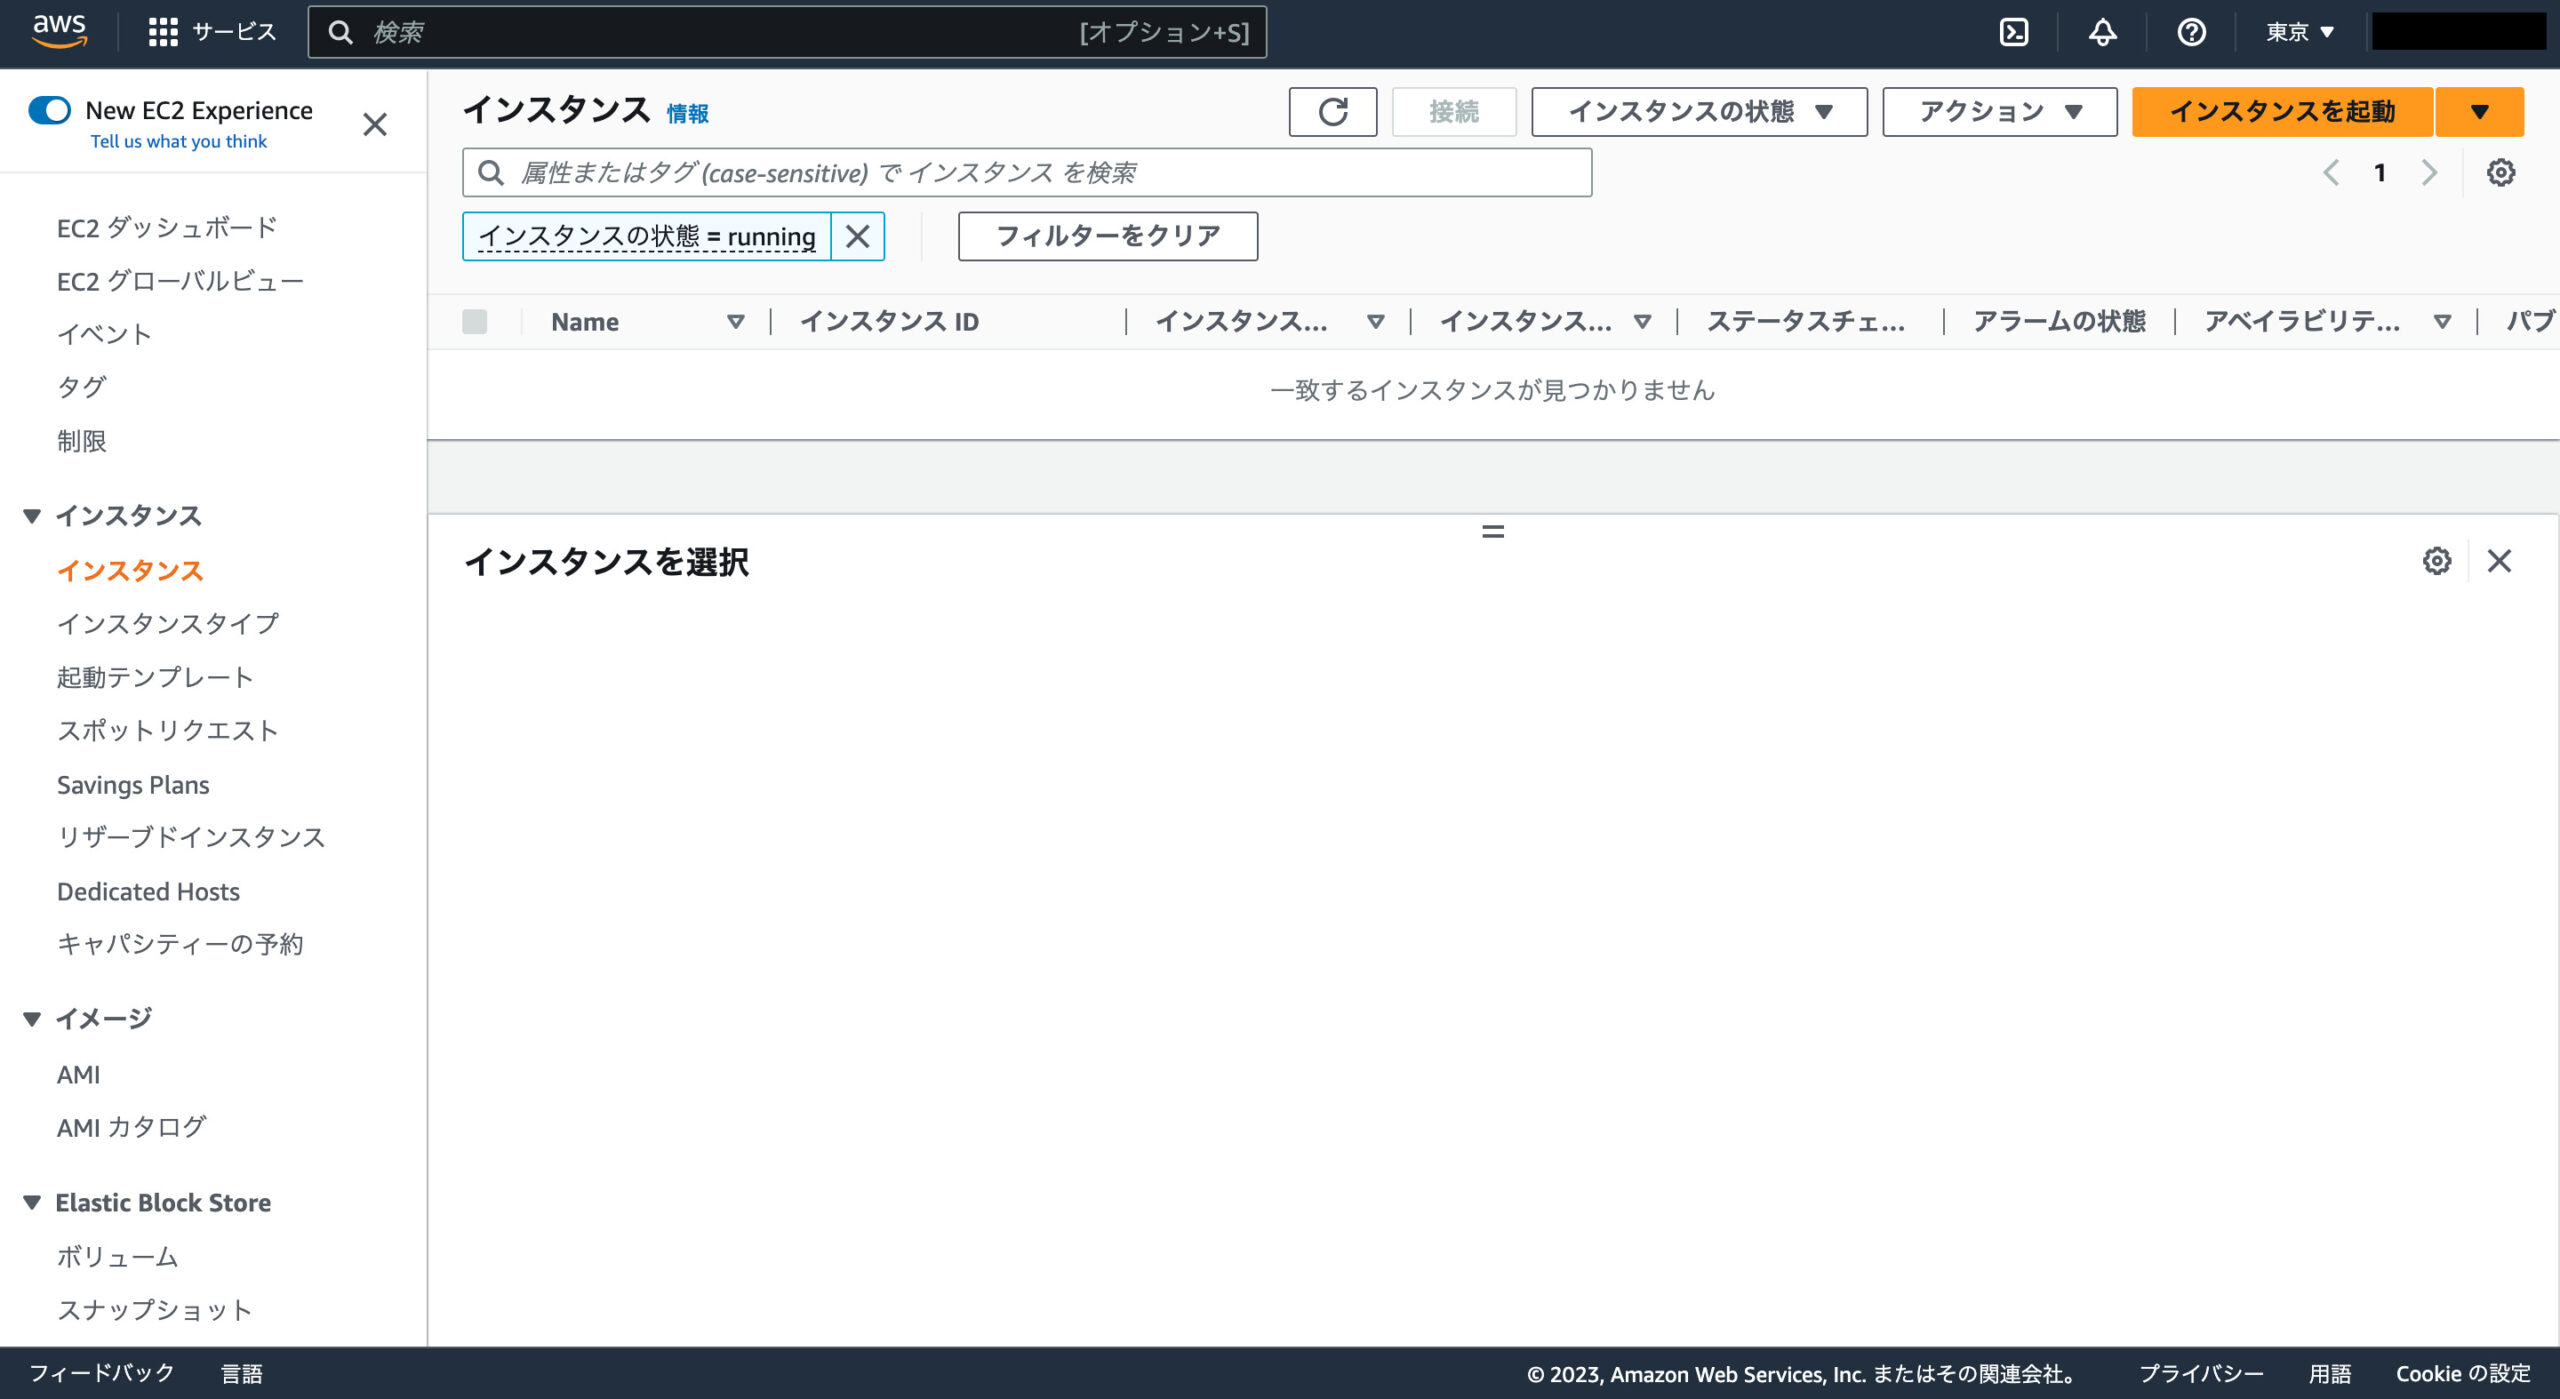
AWSコンソールのEC2ページで作成したリソースが削除されたことを確認します。
まとめ
- Terraformとはコードを使ってインフラを構築・変更・管理するためのツール
- TerraformはHCL (HashiCorp Configuration Language) と呼ばれる独自の構文を使用してインフラの構成を記述する
- IAM(Identity and Access Management)ユーザーとは、AWS上で特定のタスクに対する権限を持つユーザーのこと
- ポリシーをアタッチするとは、AWSのリソース(ストレージやデータベースなど)にアクセスする際にそのアクセス権限を設定すること
- AdministratorAccessは、AWSの管理者レベルの権限を持つIAMユーザーに対して付与されるIAMポリシーの1つ
tfenvとはTerraformのバージョンマネージャーで、tfenvを用いることでTerraformのバージョンをCLIで切り替えることができる- AWS CLIとはAWSのサービスをコマンドラインから操作するためのツール
- プロファイルとは、AWS CLIやAWS SDKなどのAWSツールで使用される認証情報を管理するための方法
参考
今回はTerraformを使ってAWSの東京リージョンにEC2インスタンスを起動してみました。今回は最小限の構成でリソースを作成してみましたが、今後は様々な構成にチャレンジしてみたいと思います。