今回は2段階認証で「git clone」できなくなった際の対処方法について解説したいと思います。2段階認証を設定した際は、cloneだけでなくpushやpullといったgit一連の操作ができなくなるため注意しておきましょう。
2段階認証とは
2段階認証とは、Githubにログインする際、ユーザー名とパスワードの他に2段階目の認証を必要とする設定のことを指します。この設定によりセキュリティの向上を図ることができます。
Two-factor authentication (2FA) is an extra layer of security used when logging into websites or apps.
2FA では、ユーザ名とパスワードを使用してログインし、さらに自分だけが知っている、または利用できる別の形式の認証でログインする必要があります。
参考: 2要素認証について
2段階目の認証として以下のいずれか3つを設定することができますが、TOTPモバイルアプリを用いることがGithub側では推奨しているようです。
- TOTPモバイルアプリ
- テキストメッセージ
- セキュリティキー
2 要素認証の設定には、時間ベースのワンタイムパスワード (TOTP) アプリケーションを使うことを強くおすすめします。TOTP アプリケーションは、特に米国外において、SMS より信頼性があります。TOTP アプリは、クラウド内にある認証コードのセキュアなバックアップをサポートしており、デバイスにアクセスできなくなった場合に回復できます。
参考: 2要素認証を設定する
2段階認証後に起こる現象
2段階認証の設定後は、git clone等のgit操作ができなくなってしまいます。
2段階認証設定後に、試しにhttpsでcloneを実行しましたが認証エラーが起きてしまいました。
% git clone https://github.com/private/sample.git
Cloning into 'sample'...
Username for 'https://github.com': yoshi-test
Password for 'https://yoshi0000@github.com':
remote: Invalid username or password.
fatal: Authentication failed for 'https://github.com/private/sample.git'
sshでのcloneも同様です。
% git clone git@github.com:private/sample.git
Cloning into 'sample'...
Enter passphrase for key '/path/to/.ssh/id_rsa':
ERROR: The `private' organization has enabled or enforced SAML SSO. To access
this repository, you must use the HTTPS remote with a personal access token
or SSH with an SSH key and passphrase
that has been whitelisted for this organization. Visit
https://help.github.com/articles/authenticating-to-a-github-organization-with-saml-single-sign-on/ for more information.
fatal: Could not read from remote repository.

Please make sure you have the correct access rights
and the repository exists.
解決方法
この現象を解決するには以下の3つのステップを踏むことで解決できます。
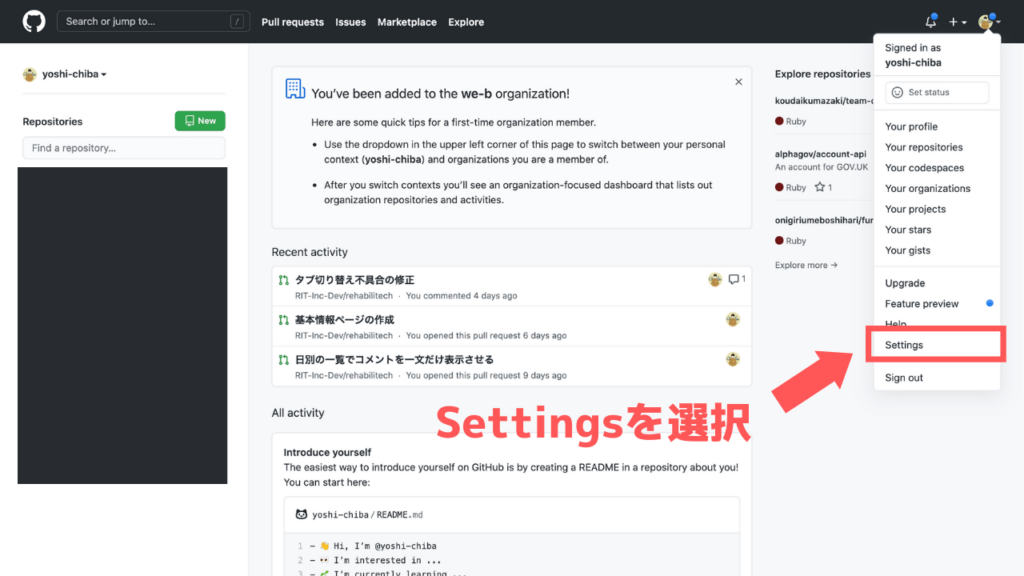
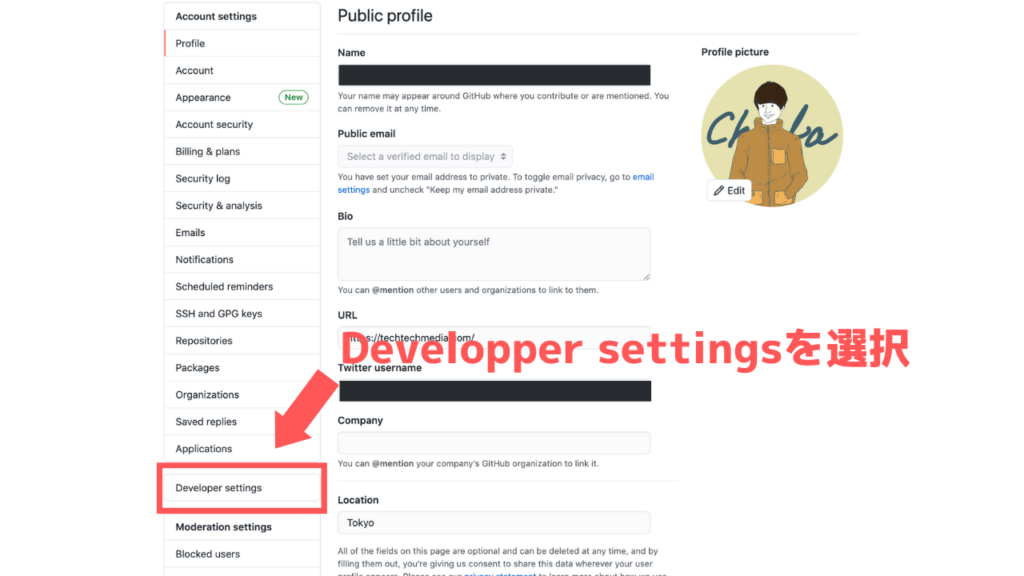
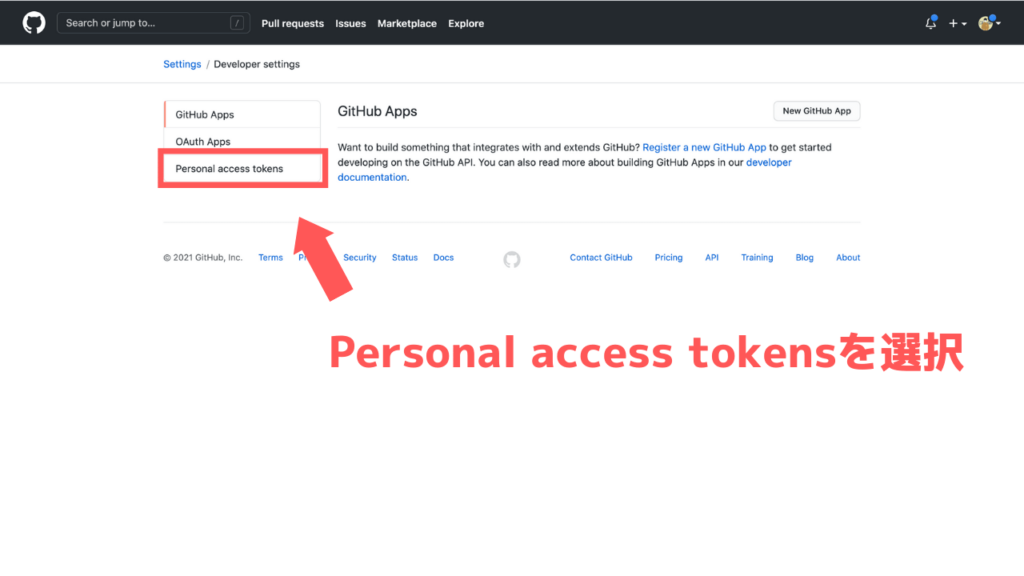
- GitHubのメニューからSettings→Developer settings→Personal access tokens→Generate new tokenに進む
- 概要を記入、全てにチェックを入れトークンを生成
- 生成されたアクセストークンをパスワードとして入力
GitHubのメニューからSettings→Developer settings→Personal access tokens→Generate new tokenに進む
以下の画像のように、Githubのメニューから「Settings」→「Developper settings」→「Personal access tokens」→「Generate new token」と進みましょう。
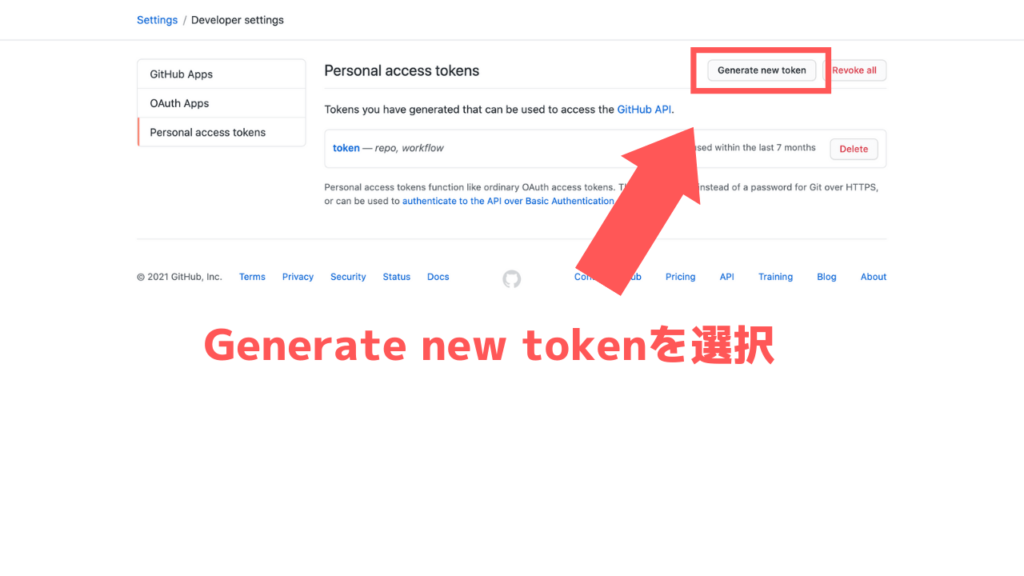
概要を記入、全てにチェックを入れトークンを生成
トークンの概要を記入し、全てにチェックを入れ「Generate token」をクリックしましょう。今回、概要欄には「2-factor-authentication-token」と入力しました。


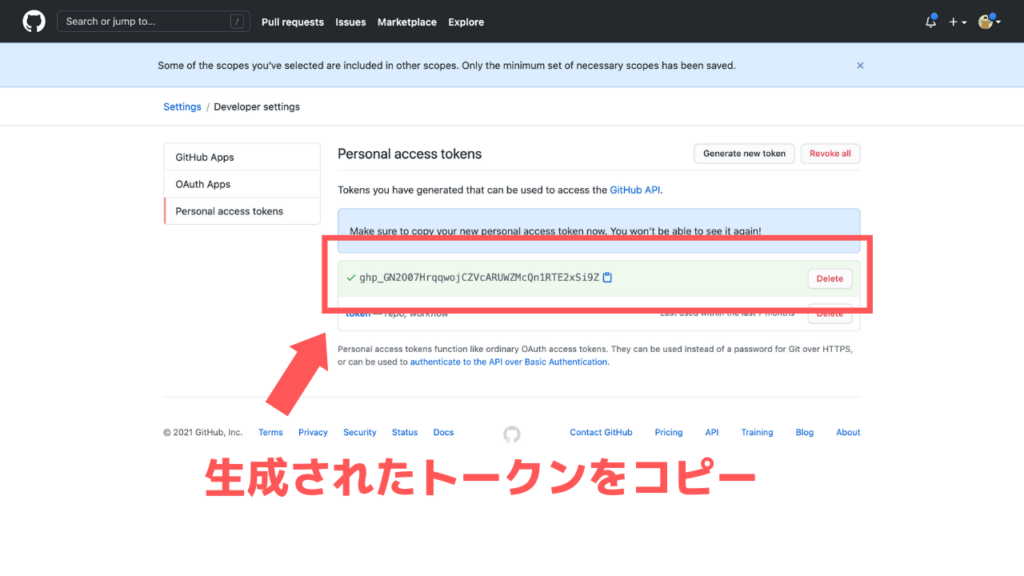
生成されたアクセストークンをパスワードとして入力
先程のトークンをコピーし、httpsでcloneした際のパスワード入力欄に貼り付けます。
% git clone https://github.com/private/sample.git
Cloning into 'sample'...
Username for 'https://github.com': sample-user
Password for 'https://sample-user@github.com':先程生成されたトークン
解決までの3ステップまとめ
- GitHubのメニューからSettings→Developer settings→Personal access tokens→Generate new tokenに進む
- 概要を記入、全てにチェックを入れトークンを生成
- 生成されたアクセストークンをパスワードとして入力
参考
今回は2段階認証で「git clone」できなくなった際の対処方法について解説しました。2段階認証後は忘れずにトークンを作成しておきましょう。